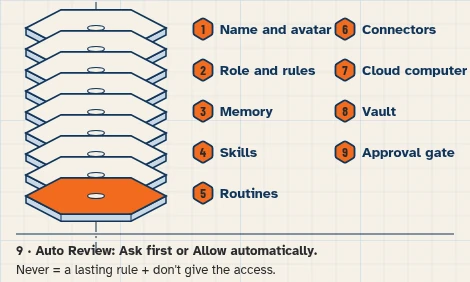
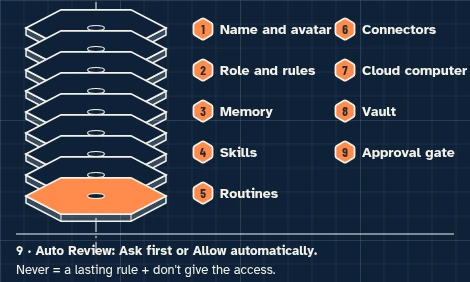
This walkthrough uses a fictional soap shop. It has not been run end to end, and it creates no routines.
No Shopify store yet? This guide builds a Grok Bot that creates a new Shopify store from your chat, before you sign up, then helps you run it: products, prices, collections, discount codes, stock, orders, customer reply drafts, sales reports and design changes. You save the store to your own Shopify account, you do the admin-only setup yourself, and you approve every change before it goes live. [1][2]
Already selling? Add a read-only morning brief with the Shopify Store Ops build.
At a glance
What you’ll have at the end
A fictional Bluebonnet Hollow Store Builder Bot that:
- Created and designed a password-protected Shopify store from a description, before anyone signed up for Shopify.
- Was reconnected to the store after you saved it to your own Shopify account.
- Handles everyday jobs when you ask: products, prices, collections, percentage-off codes, stock counts, order and customer lookups, customer reply drafts, sales reports and design edits on an unpublished copy.
Rosa, the owner, approves every store change. Payments, taxes, shipping, policies, domain and plan stay with her in Shopify admin. This walkthrough has not been run end to end; the examples under each step show what a good result should look like, not results from a run.
What you need
- A Grok Bot account. Access that includes Grok Bot may require a paid plan; check eligibility, cost and usage on the day you follow this guide. [9]
- Lessons 1.6 First Bot, 2.1 Prompting, 2.2 Connectors, 2.6 Approvals and 2.8 Routines.
- An email address for your Shopify account. You create the account yourself in step 11.
- Optional: a separate test Gmail mailbox, for the customer reply drafts in steps 23 and 24.
Difficulty: Beginner to Intermediate
Meet the store
Example data (fictional): Bluebonnet Hollow Soap Co., 120 Example Lane, Austin, TX 78701, is invented, and so is its phone number, (512) 555-0174. Owner Rosa approves every store change, price and discount. Helper Eli packs orders and reads the reports. The store uses Central Time (America/Chicago) and US dollars.
Rosa has no Shopify store yet. Her price list, which the Bot must never change on its own:
| Product (fictional) | Price | Collection |
|---|---|---|
| DEMO Lavender Oat Bar | $9.00 | Bar Soaps |
| DEMO Cedar & Sage Bar | $9.00 | Bar Soaps |
| DEMO Unscented Goat Milk Bar | $8.00 | Bar Soaps |
| DEMO 3-Bar Gift Box | $24.00 | Gifts (tag: gift) |
Starting stock is a demonstration count of 20 of each, at one location. This walkthrough builds one store and runs each everyday job once, by hand. It creates no routine.
Before you start
What it costs. Shopify Help says standard Shopify plan pricing applies to a store you create or run with Grok, there’s no extra Shopify fee for the connector, and you pay any Grok subscription costs to xAI. [1] Shopify describes two different trial offers:
- A store created with an AI tool: “A new store created with an AI tool or vibe code partner starts on a free trial of 4 months,” and “Your free trial begins when you save or claim the store, not when the store is created.” (Shopify Help) [2]
- A normal signup on shopify.com: “Try 3 days free, then $1/month for 3 months,” with no credit card required for the trial. Standard prices are Basic $39, Grow $105 and Advanced $399 USD a month paid monthly, or $29, $79 and $299 a month paid yearly. (Shopify pricing) [5]
Offers change. After you save the store, check Settings > Plan in your Shopify admin to see which one applies to you. [2] Prices were read on November 15, 2026.
Grok Bot, not Grok. The Shopify connector works in both, but installing it in Grok doesn’t install it in Grok Bot. Use Connect apps in Grok Bot. [1]
Connected apps are shared across every Bot on your account. A new Bot can already use every app you’ve connected, including real accounts. [8] If you already run a store, make sure the Bot is working on the right one.
A fair note on Sidekick. Shopify says the connector “doesn’t replace your Shopify admin, and it doesn’t replace Sidekick”, Shopify’s own assistant. [1] See Grok Bot vs Shopify Sidekick and AI agents for Shopify.
Before you save the store. The storefront is password protected; anyone with the store’s address can view it and change it from an AI tool; the view link expires after about 30 minutes; and products you add are set to active and published, still behind the password. [1]
What Grok Bot can and can’t do in Shopify
From Shopify Help, read November 15, 2026. What the connector can change also depends on the data access you approve and on your user permissions. [1][3]
| Task | Can Grok Bot do it? | Limits |
|---|---|---|
| Create a store before you sign up | Yes | create_store. Password protected until you choose a paid plan; anyone with the address can edit it. |
| Save the store | You do it | The Bot gives a save link (get_preview_store_links); you sign in or create the account. |
| Keep working after saving | After you reconnect | The tool isn’t connected to the store after you save it. Authorize it again. [2] |
| Products: create and edit | Yes | create-product, update-product. Images by public web address only. |
| Products: active, draft, archived | Yes | bulk-update-product-status, up to 50 at a time. |
| Collections | Yes | Manual or smart. Published to the online store when created. |
| Stock counts | Read and set | One item at one location, with a reason. Stops if the count changed. |
| Discount codes | Percentage-off only | No fixed-amount codes; can’t change existing codes. |
| Orders | Read only | Up to 50 at a time. No refunds, cancels, captures, mark-as-paid or returns. |
| Customers | Read only | No edits. |
| Sales analytics | Read | run-analytics-query (ShopifyQL). One short question at a time. |
| Pages, menus, blogs, translations | Yes, via the Admin API | Asks you to confirm. Results vary, so check in admin. |
| Theme design | Unpublished copy | Can’t edit the live theme or delete a theme. theme_publish asks you to confirm; in this guide, you publish. |
| Gift cards | No | Blocked, even with write access. |
| Plan, payments, taxes, domains, launch readiness | No | Do this yourself in Shopify admin. |
| Shipping settings and store policies | Not documented | Shopify lists them as admin tasks. Do this yourself in Shopify admin. [2] |
| More than one store | One at a time | Switch, then start a new conversation. [3] |
More detail: permissions and limits and the Shopify connector.
Set the boundaries before using apps
1. Add Ask first rules
What to do in the app
- Open Settings → General.
- Under Bot, leave Auto-review on.
- Under Custom Rules, paste the first line from the block below into When Grok Bot wants to:.
- Under It should:, choose Ask first.
- Press Add Rule.
- Repeat steps 3–5 for the second line, then for the third line.
An action that matches an Ask first rule always gets an approval card in your chat. Auto Review has only Allow automatically and Ask first; there is no “Never” choice. It’s model-based, not a lock, so the role prompt in step 4 and Shopify’s own limits are the other layers. [6]
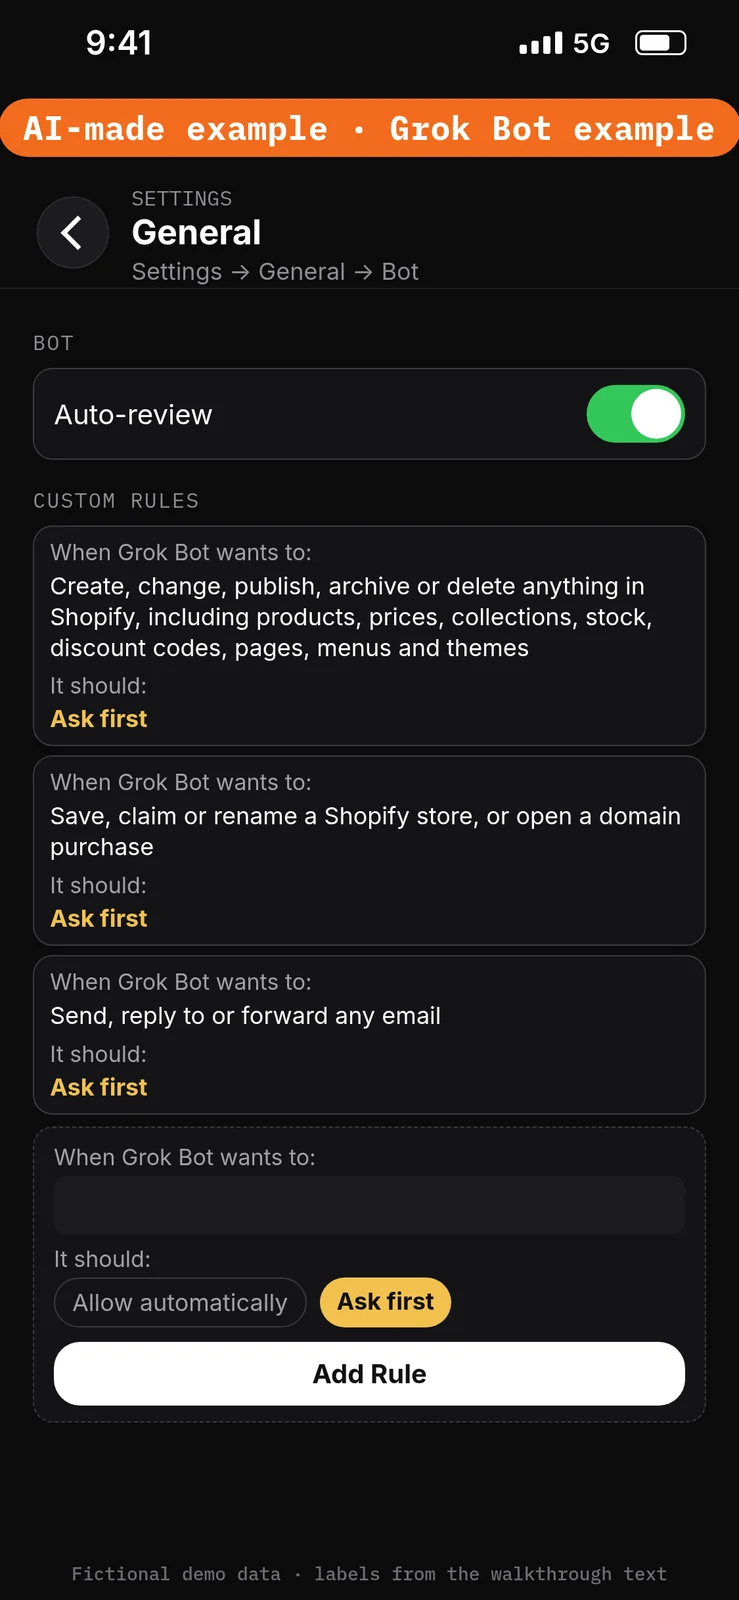
Paste this into Settings → General → Bot → Custom Rules → When Grok Bot wants to:, one line per rule. Choose Ask first under It should: each time, then press Add Rule.
Create, change, publish, archive or delete anything in Shopify, including products, prices, collections, stock, discount codes, pages, menus and themes
Save, claim or rename a Shopify store, or open a domain purchase
Send, reply to or forward any email
Create the Bot and connect Shopify
2. Create the Bluebonnet Hollow Store Builder Bot
What to do in the app
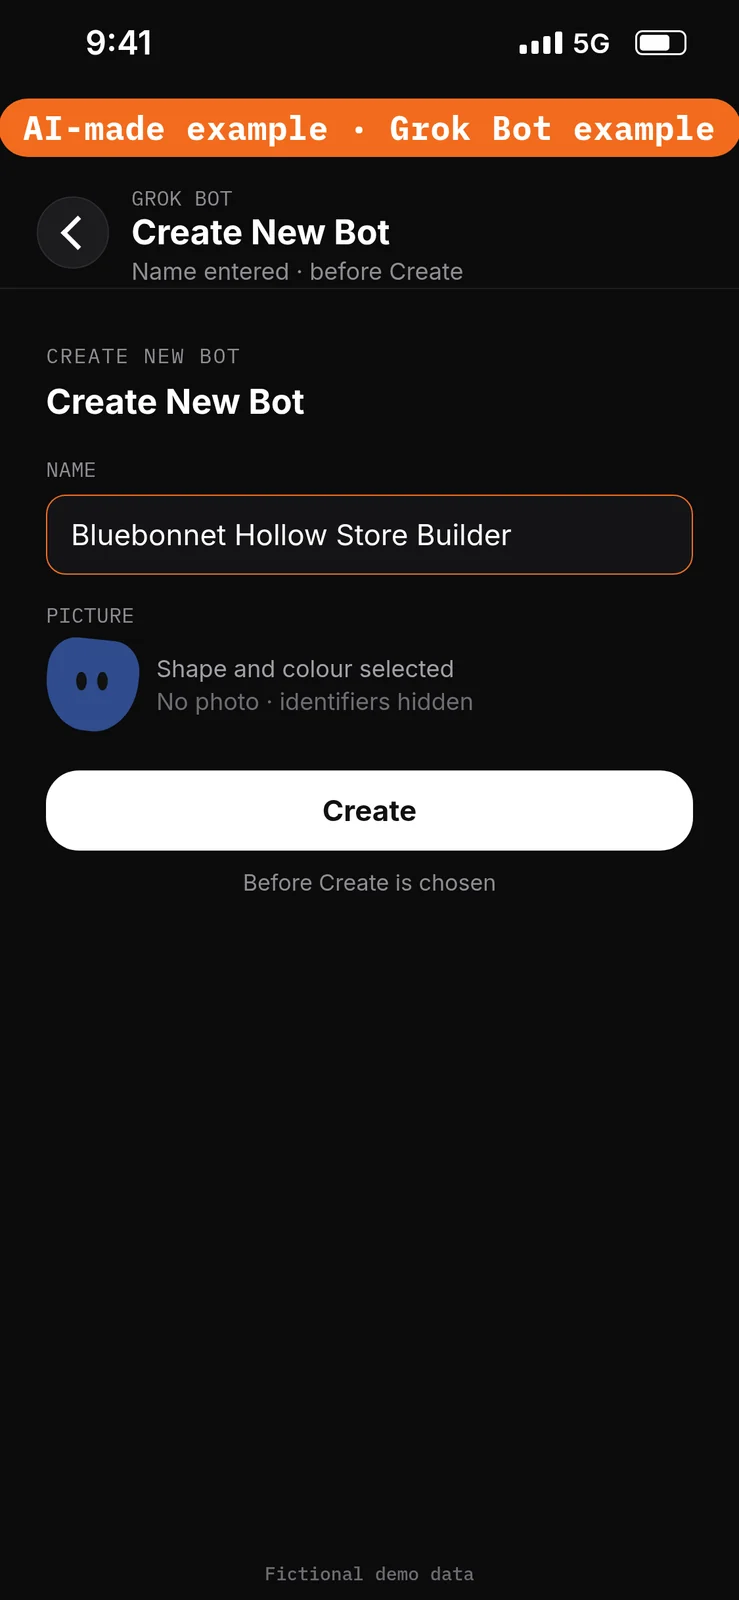
- Choose New Bot (the + button at the top of the sidebar). On a team, the + button opens a menu; choose Create a Bot. [7]
- In Create New Bot, type the name
Bluebonnet Hollow Store Builder, pick a shape and color, then choose Create. - Grok Bot opens a chat with the new Bot. Leave that chat for the role prompt in step 4.
No prompt.
3. Connect the Shopify connector
What to do in the app
- Open Connect apps from the sidebar. In the mobile app, tap your avatar on the top left and choose Connect apps.
- Search for Shopify, then add it.
- When Grok Bot asks you to Authorize or Authenticate, finish the sign-in in your browser. [8]
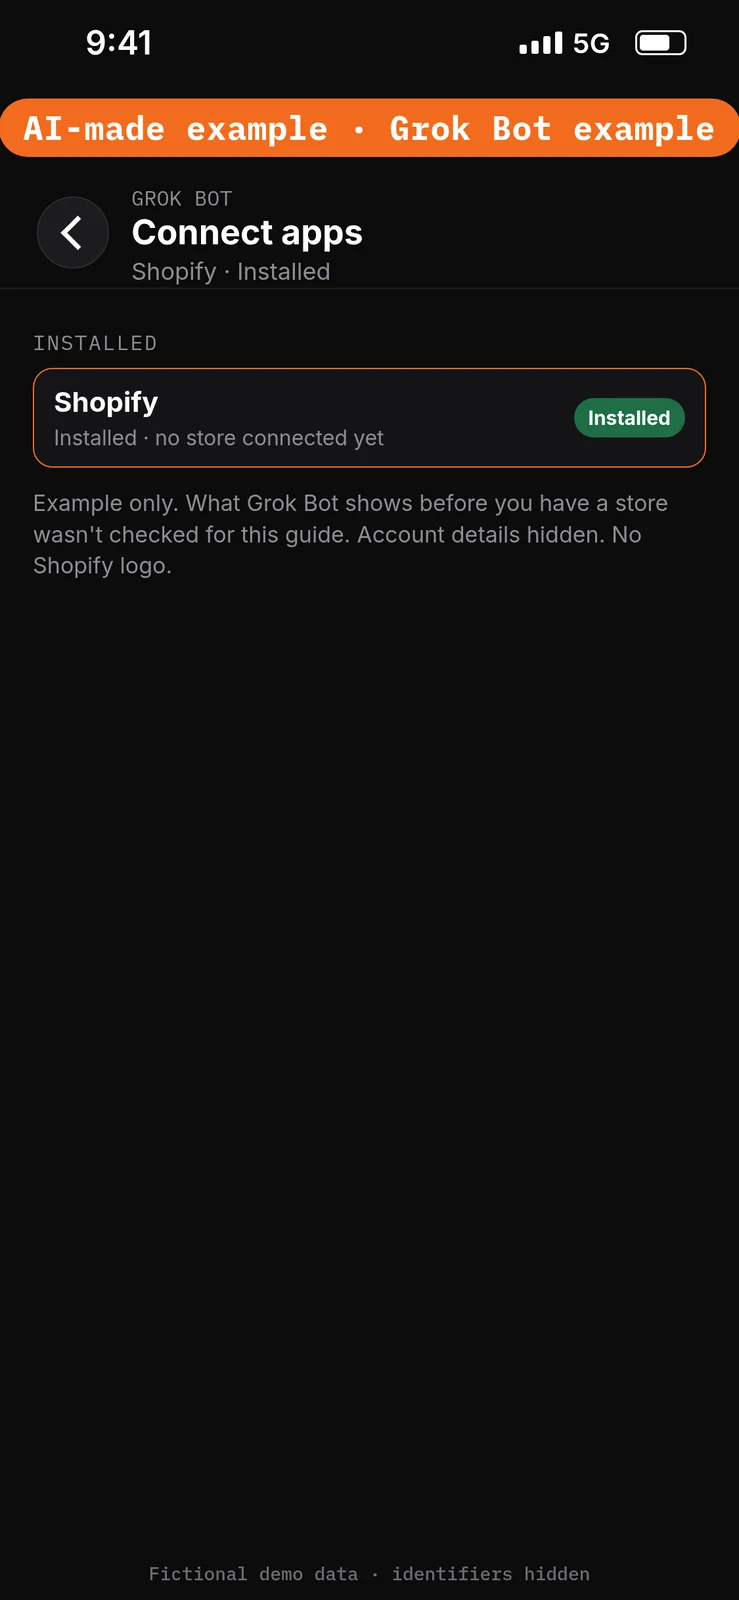
Install it here, in Grok Bot. Shopify Help says the connectors page in Grok doesn’t install the connector for Grok Bot, and the connector isn’t on the Shopify App Store. There’s no extra Shopify fee for using it. [1] More detail: the Shopify connector page.
You don’t have a store yet, so there may be nothing to approve in Shopify admin at this point. Shopify says some AI tools ask you to connect the first time you ask for something that needs your store. [3] We haven’t checked what Grok Bot shows here when you have no store, so follow what you see on screen.
Connected apps are shared across every Bot on your account. This new Bot can already see your existing connections, including real accounts if those are what’s connected. [8] If you already run a real Shopify store, check which store the Bot is connected to before you ask it to change anything.
No prompt.
Give the Bot its role
4. Paste the role and the approved facts
What to do in the app
Open the Bluebonnet Hollow Store Builder chat. Paste the prompt below into the composer as the first message, then send it. It asks the Bot to remember the job, sources and boundaries. [7]
Job, Sources, Output, Boundaries, Finish line is Bot Agents 24’s five-part prompt framework, not a product setting. See prompting.
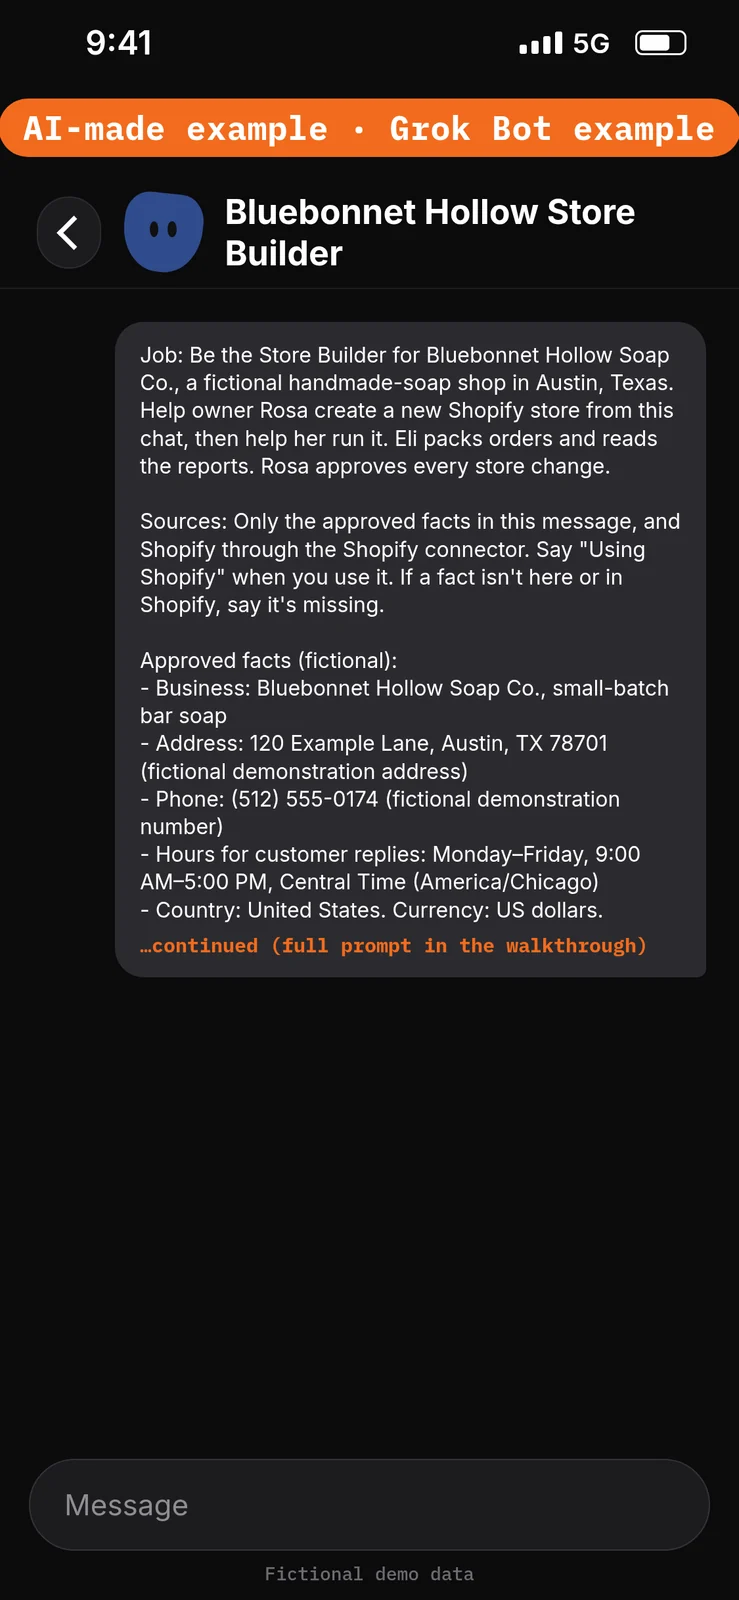
Paste this into Bot chat → the composer.
Job: Be the Store Builder for Bluebonnet Hollow Soap Co., a fictional handmade-soap shop in Austin, Texas. Help owner Rosa create a new Shopify store from this chat, then help her run it. Eli packs orders and reads the reports. Rosa approves every store change.

Sources: Only the approved facts in this message, and Shopify through the Shopify connector. Say "Using Shopify" when you use it. If a fact isn't here or in Shopify, say it's missing.

Approved facts (fictional):
- Business: Bluebonnet Hollow Soap Co., small-batch bar soap
- Address: 120 Example Lane, Austin, TX 78701 (fictional demonstration address)
- Phone: (512) 555-0174 (fictional demonstration number)
- Hours for customer replies: Monday–Friday, 9:00 AM–5:00 PM, Central Time (America/Chicago)
- Country: United States. Currency: US dollars.
- Products and prices, set by Rosa: DEMO Lavender Oat Bar, $9.00 · DEMO Cedar & Sage Bar, $9.00 · DEMO Unscented Goat Milk Bar, $8.00 · DEMO 3-Bar Gift Box, $24.00 (tag: gift)
- Starting stock: 20 of each, at one location (demonstration count)
- Collections: Bar Soaps (the three bars) · Gifts (every product tagged gift)
- Brand: deep blue #2F4B8C, cream #F7F1E3, serif headings, warm and plain wording
- Sign-off: Rosa at Bluebonnet Hollow Soap Co.

Output: Plans and drafts in this chat, labelled DRAFT — OWNER REVIEW. Before any store change, list exactly what will change and wait until Rosa replies "approve".

Boundaries: Never invent a price, stock count, policy, bar weight, ingredient or claim such as "organic", "natural" or "good for sensitive skin". One change per request. Never save, claim or rename the store, or open a domain purchase, without asking first. Never touch payments, taxes, shipping, plan or domain settings; say "Rosa does this in Shopify admin." No refunds, cancellations or order edits. Never send email. Don't share the store's view link outside this chat. Remember these job, source and boundary rules.

Finish line: Restate the boundaries, name anything missing, then wait.
Build the store from chat, before you sign up
5. Create the store from a description
What to do in the app
Stay in the Bluebonnet Hollow Store Builder chat. Paste the prompt below, then send it. The connector runs create_store, which creates a store before you have a Shopify account and returns a link to view it. [1]
Until you save it, the store isn’t connected to a Shopify account. Shopify Help lists what that means [1]:
- The storefront is password protected, so customers can’t buy from it.
- Anyone who has the store’s address can view it and make changes to it from an AI tool. Don’t share the link.
- The store starts with a Canvas theme, is set up for the country you give (or the United States), and can include sample content.
- It’s a starting point, not a finished store.
This message is Rosa’s approval for one change only: creating the store.
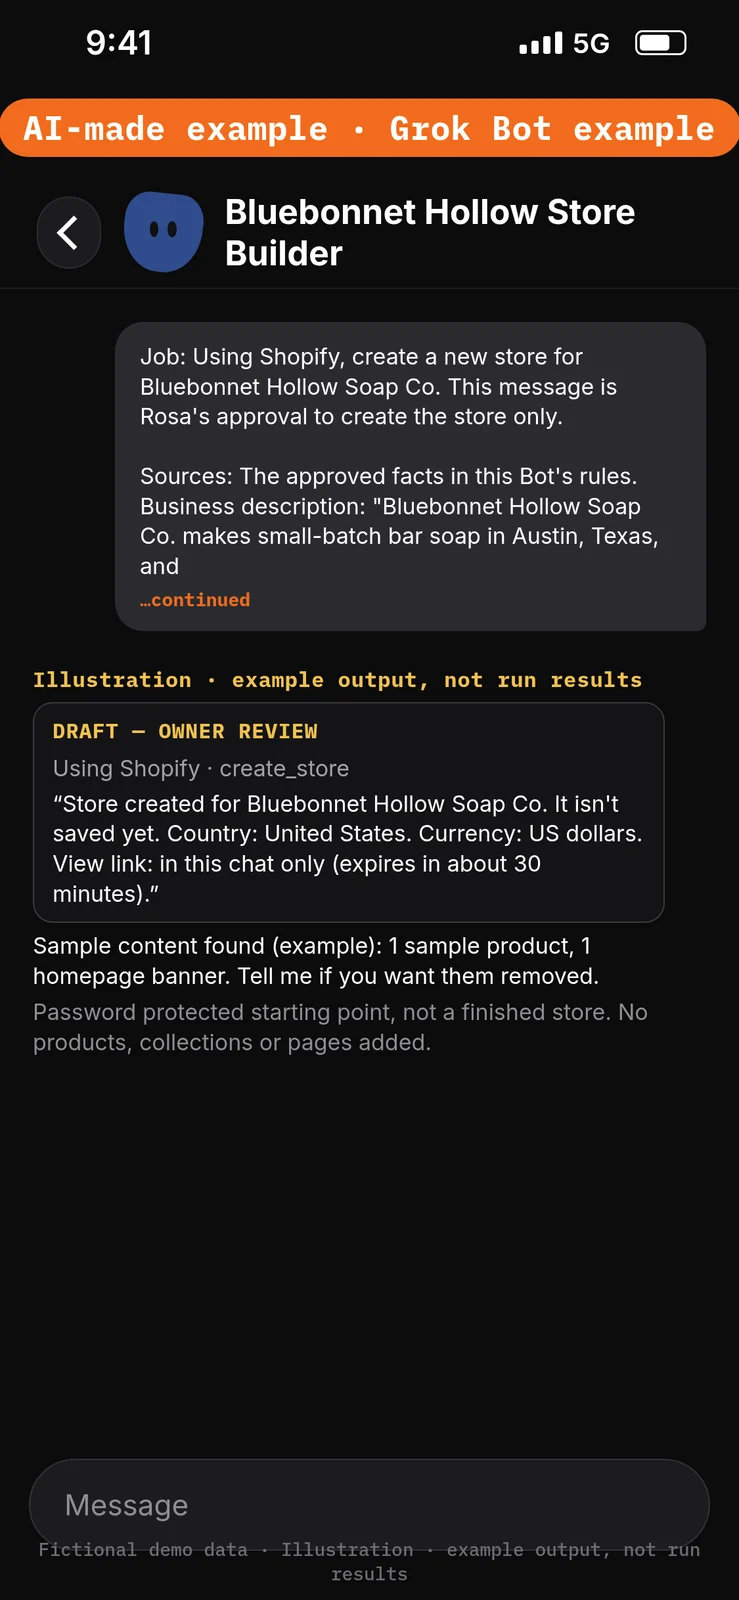
Paste this into Bot chat → the composer.
Job: Using Shopify, create a new store for Bluebonnet Hollow Soap Co. This message is Rosa's approval to create the store only.

Sources: The approved facts in this Bot's rules. Business description: "Bluebonnet Hollow Soap Co. makes small-batch bar soap in Austin, Texas, and sells online across the United States." Country: United States. Currency: US dollars.

Output: The link to view the store, and a screenshot of the homepage if the connector shows one. List any sample content the store came with, so Rosa can decide what to remove. Label it DRAFT — OWNER REVIEW.

Boundaries: Don't add products, collections or pages yet. Don't save or rename the store, suggest business or domain names, or open a purchase. Don't share the view link outside this chat.

Finish line: Remind Rosa that the store is a password-protected starting point, not a finished store. Then stop.
Example data (fictional) — not run results:
6. Add the four products with Rosa’s prices
What to do in the app
Paste the prompt below, then send it. Check the table against Rosa’s price list. Reply approve only if every title, price and tag is right. The connector then runs create-product, one product at a time. [1]
If you give only a name and a price, the connector writes the description itself, so the prompt gives the rules for it. On a store that isn’t saved yet, products you add are set to active and published, still behind the password. Images can only be added from a public web address; you upload photos from your computer in Shopify admin after saving. [1]
Stock counts come later, in step 20, after the store is saved. More detail: products and inventory.
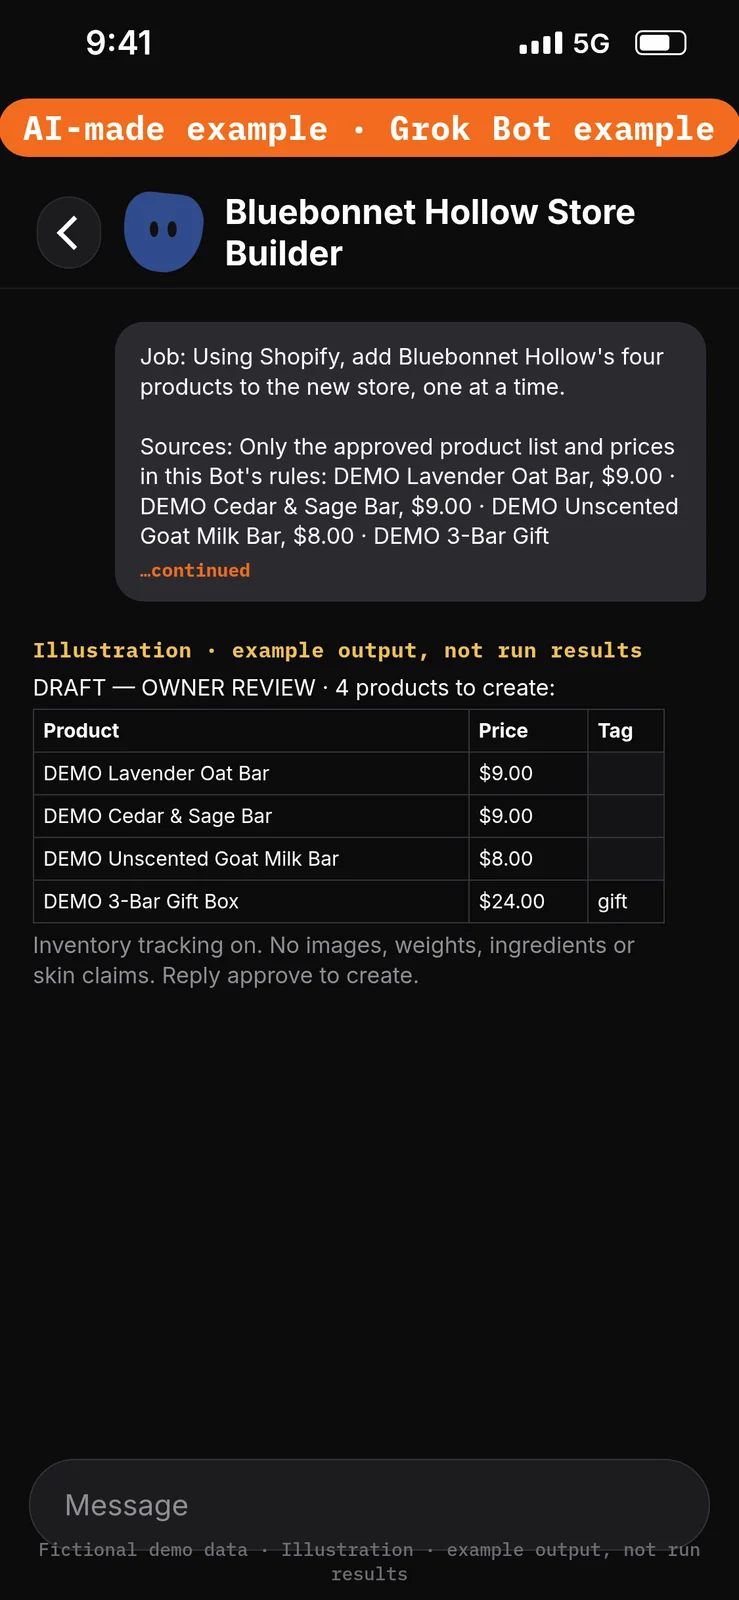
Paste this into Bot chat → the composer.
Job: Using Shopify, add Bluebonnet Hollow's four products to the new store, one at a time.

Sources: Only the approved product list and prices in this Bot's rules: DEMO Lavender Oat Bar, $9.00 · DEMO Cedar & Sage Bar, $9.00 · DEMO Unscented Goat Milk Bar, $8.00 · DEMO 3-Bar Gift Box, $24.00 (tag: gift). Turn inventory tracking on for each one.

Output: First, a table of all four products with title, price, tag and a one- or two-sentence description, labelled DRAFT — OWNER REVIEW. After Rosa replies "approve", create them with create-product and report each product's title, price and status.

Boundaries: Descriptions use only the product name, its scent and what's in the box. No health, skin or "organic" claims, no bar weight and no ingredients list. Leave images empty. Don't change anything else.

Finish line: Stop after the table and wait for "approve".
Example data (fictional) — not run results:
7. Create the two collections
What to do in the app
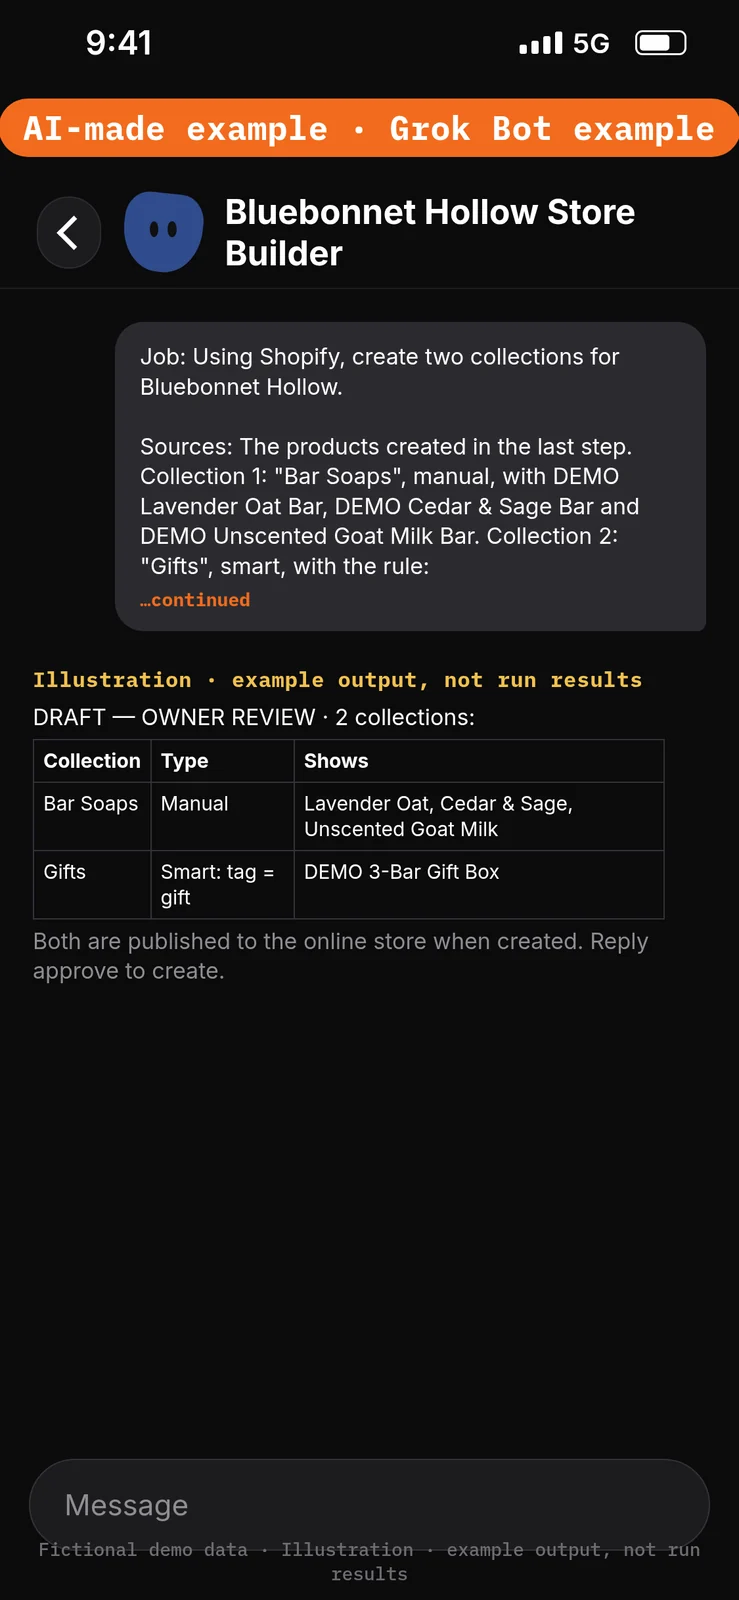
Paste the prompt below, then send it. Check which products each collection will show, then reply approve. The connector runs create-collection. [1]
Shopify says a collection is published to your online store when it’s created, which is why the prompt asks for a plan first. A smart collection adds matching products automatically, such as every product with a particular tag. [1]
Paste this into Bot chat → the composer.
Job: Using Shopify, create two collections for Bluebonnet Hollow.

Sources: The products created in the last step. Collection 1: "Bar Soaps", manual, with DEMO Lavender Oat Bar, DEMO Cedar & Sage Bar and DEMO Unscented Goat Milk Bar. Collection 2: "Gifts", smart, with the rule: product tag is equal to gift.

Output: List both collections with their type, rule and the products that will appear, labelled DRAFT — OWNER REVIEW. After Rosa replies "approve", create them with create-collection and report what was created.

Boundaries: Create nothing before "approve". Don't change products, prices or tags.

Finish line: Stop and wait.
8. Change the design: colors, fonts and homepage text
What to do in the app
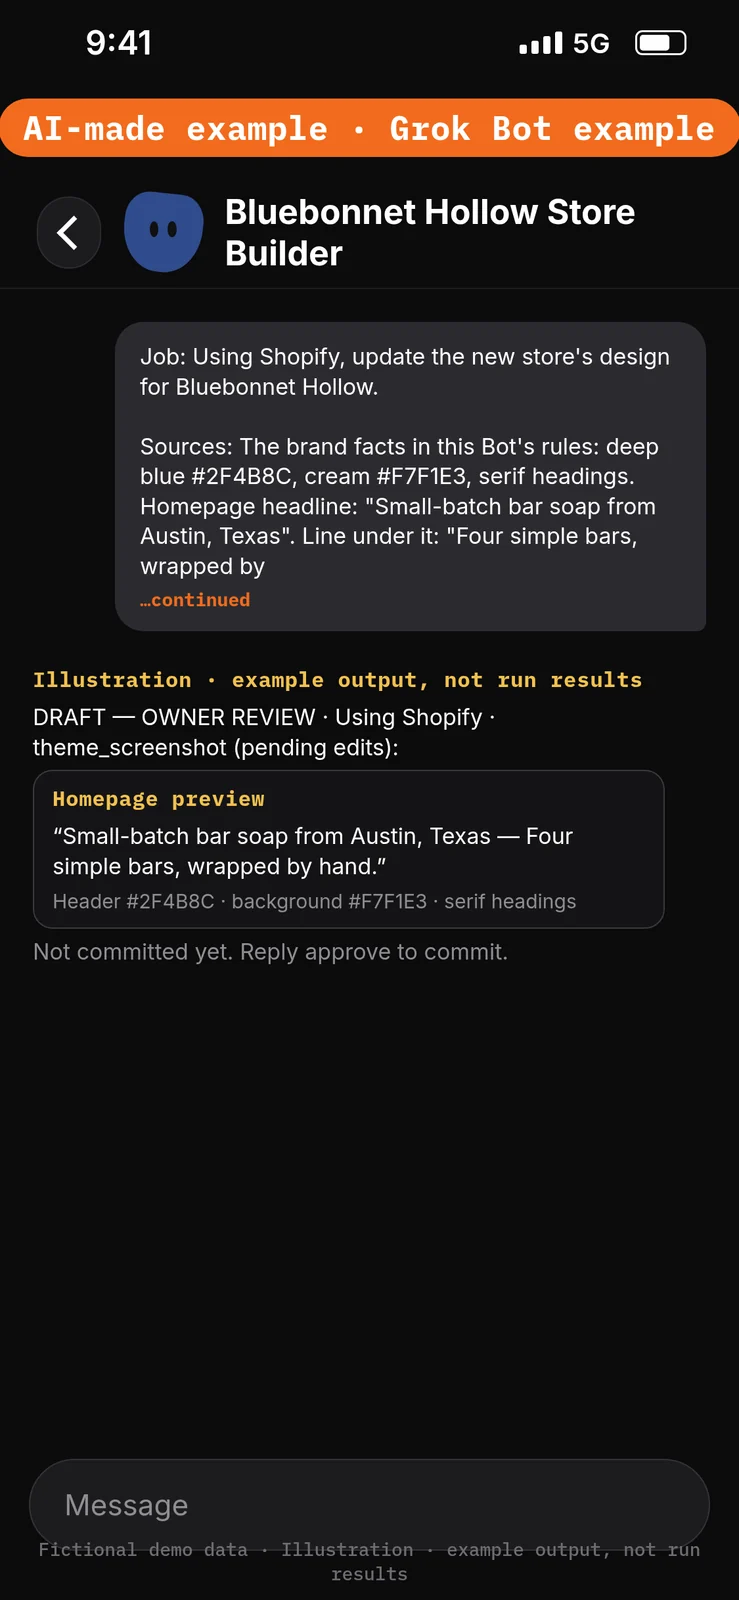
Paste the prompt below, then send it. The connector edits the theme files with theme_bash. The edits stay pending until they’re committed, and theme_screenshot shows the page with the pending edits. Reply approve only after you’ve checked the screenshot; then the Bot runs theme_commit. [1]
On a store that isn’t saved yet, committed edits are saved to the store’s live theme, which is still behind the password. After you save and connect the store, edits go to an unpublished copy instead (step 26). [1] More detail: theme design.
Paste this into Bot chat → the composer.
Job: Using Shopify, update the new store's design for Bluebonnet Hollow.

Sources: The brand facts in this Bot's rules: deep blue #2F4B8C, cream #F7F1E3, serif headings. Homepage headline: "Small-batch bar soap from Austin, Texas". Line under it: "Four simple bars, wrapped by hand."

Output: Make the edits, then show a theme_screenshot of the homepage with the pending edits, labelled DRAFT — OWNER REVIEW. Run theme_commit only after Rosa replies "approve".

Boundaries: Change colors, the heading font and the homepage text only. No new claims, products, prices or pages.

Finish line: Say where the committed edits will be saved, then wait.
9. Draft the About, Shipping and Returns text
What to do in the app
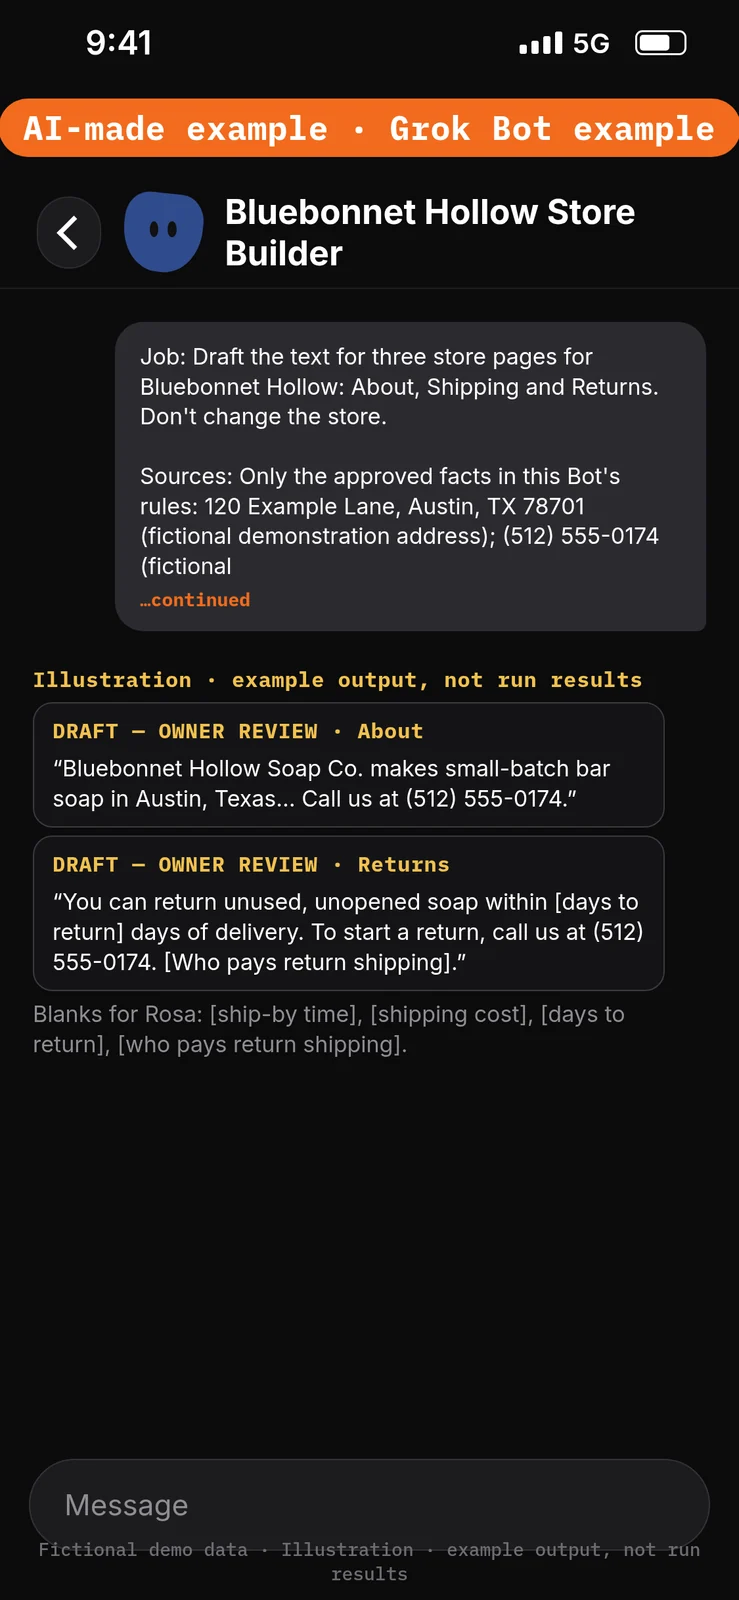
Paste the prompt below, then send it. This step changes nothing in the store. Rosa fills in every blank in [brackets] before any of this text goes on the site.
Write the shipping and returns text so a customer can read it as it is, and leave the facts only Rosa knows as blanks. When we tested our Store Ops build on November 15, 2026, a sample returns policy written as staff notes left the Bot nothing it could quote to a customer. This is not legal advice. The About page is created in step 15; Rosa adds the shipping and returns policies herself in Shopify admin (step 13).
Paste this into Bot chat → the composer.
Job: Draft the text for three store pages for Bluebonnet Hollow: About, Shipping and Returns. Don't change the store.

Sources: Only the approved facts in this Bot's rules: 120 Example Lane, Austin, TX 78701 (fictional demonstration address); (512) 555-0174 (fictional demonstration number); hours Monday–Friday, 9:00 AM–5:00 PM, Central Time (America/Chicago).

Output: Three drafts in this chat, each labelled DRAFT — OWNER REVIEW. About: 60–90 words about the shop, the city and how to reach us. Shipping and Returns: plain sentences a customer can read, with blanks in [brackets] for Rosa, such as [ship-by time], [shipping cost], [days to return] and [who pays return shipping].

Boundaries: Don't invent shipping times, costs, carriers or a return window. Don't create pages or policies. Don't present this as legal advice.

Finish line: List every blank Rosa must fill in.
Example data (fictional) — not run results:
10. Get a fresh view link and review the store
What to do in the app
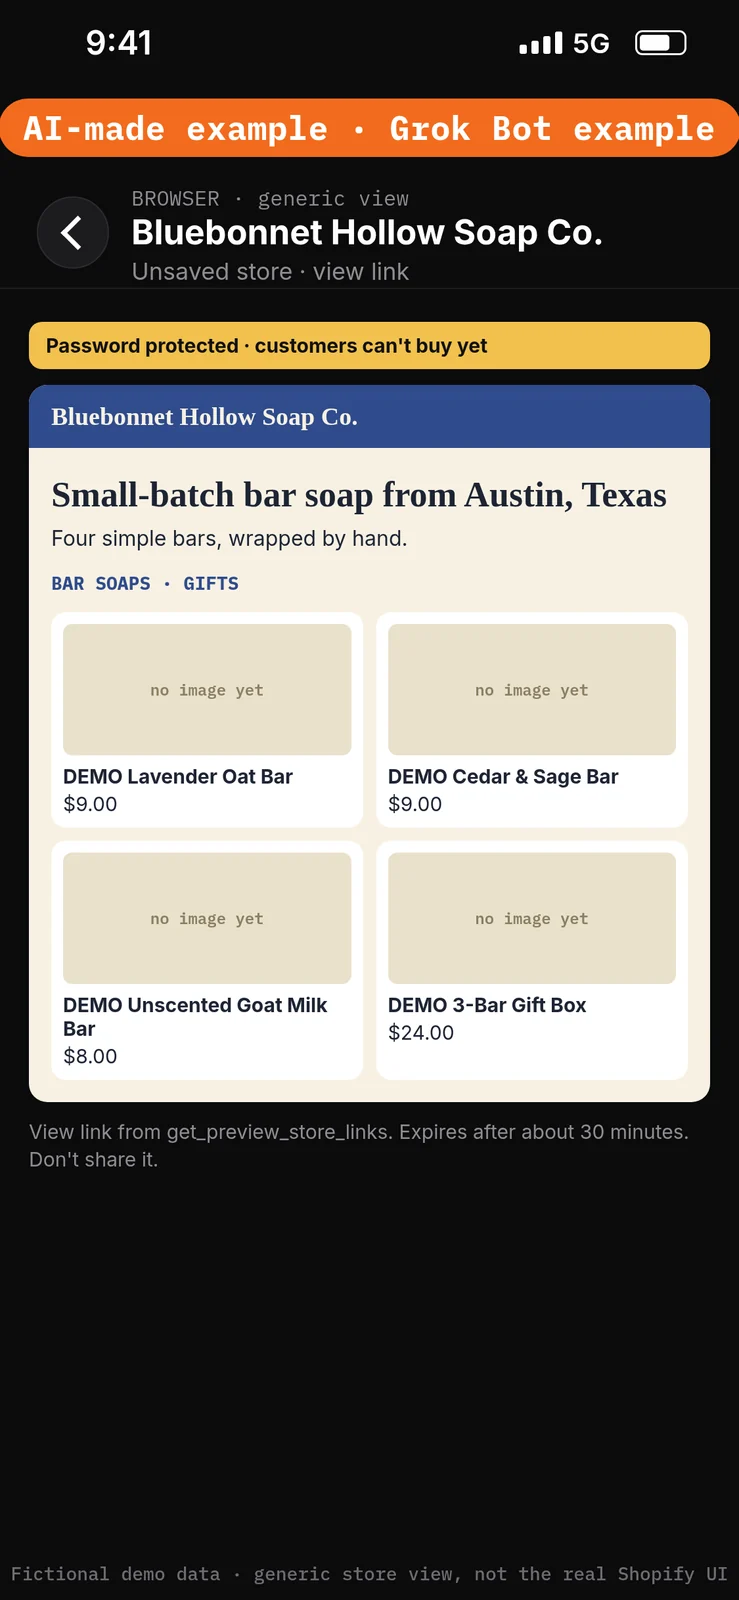
Paste the prompt below, then send it. The connector runs get_preview_store_links, which returns a new link to view a store you haven’t saved yet. [1] Open it and check every product, price, collection and the homepage.
The view link expires after about 30 minutes. If it doesn’t open, ask for a new one. [1]
Paste this into Bot chat → the composer.
Job: Using Shopify, give me a new link to view the Bluebonnet Hollow store, so Rosa can check it.

Sources: The store as it is now.

Output: The view link, and a short checklist of what Rosa should look at: each product's title, price and description, both collections, and the homepage.

Boundaries: Don't change anything. Don't share the link outside this chat.

Finish line: Remind me the link expires after about 30 minutes.
Save the store and finish setup in Shopify admin
11. Save the store to your Shopify account
What to do in the app
Paste the prompt below, then send it. Then you open the save link and sign in to Shopify or create a Shopify account. Saving connects the store to your account and makes you the store owner. [1]
Do this yourself: type your own email and password on Shopify’s page. The Bot never signs up for you.
The save link can take a few minutes to be ready after the store is created. If it isn’t ready yet, the link starts a new Shopify signup instead, so wait a few minutes and ask again. Business-name and domain suggestions also save the store first, then rename it or open a domain purchase, which is why step 1 has an Ask first rule for them. [1]
Shopify says your free trial begins when you save or claim the store, not when it’s created. [2]
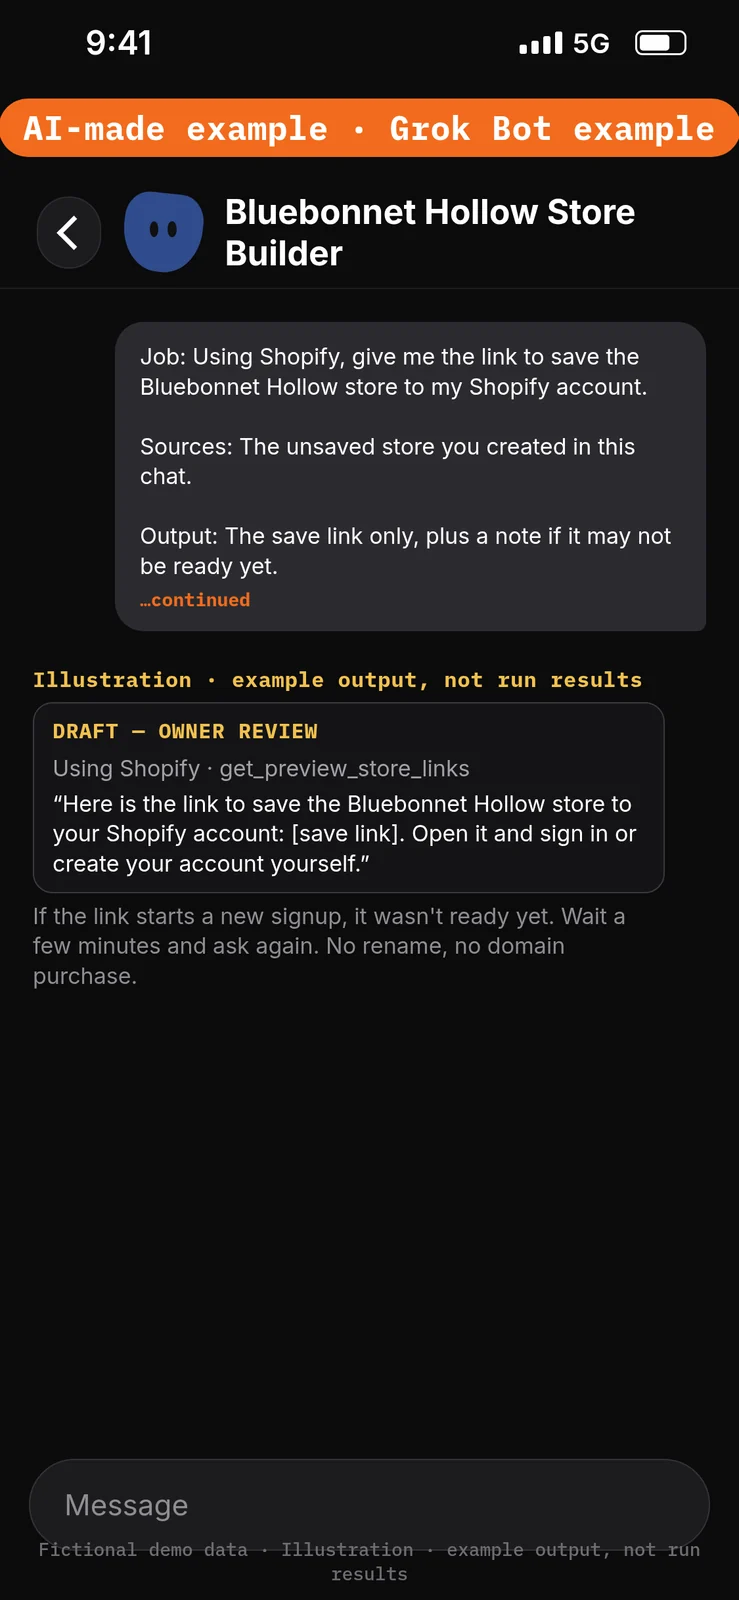
Paste this into Bot chat → the composer.
Job: Using Shopify, give me the link to save the Bluebonnet Hollow store to my Shopify account.

Sources: The unsaved store you created in this chat.

Output: The save link only, plus a note if it may not be ready yet.

Boundaries: Don't rename the store, suggest business or domain names, or open a domain purchase. Don't ask for or type my email or password; I sign in on Shopify's page myself.

Finish line: Stop after the link.
12. Finish account setup from the welcome email
What to do in the app
Do this yourself in Shopify admin. The Bot doesn’t do this step.
- If you didn’t already have a Shopify account, open the welcome email from Shopify.
- Click Finish setup.
- Add your profile details.
- Choose your sign-in options to create your Shopify account. [2]
The setup link expires 10 days after the email is sent. If it expires, you can still log in with a one-time code sent to your email address, or reset your password. [2]
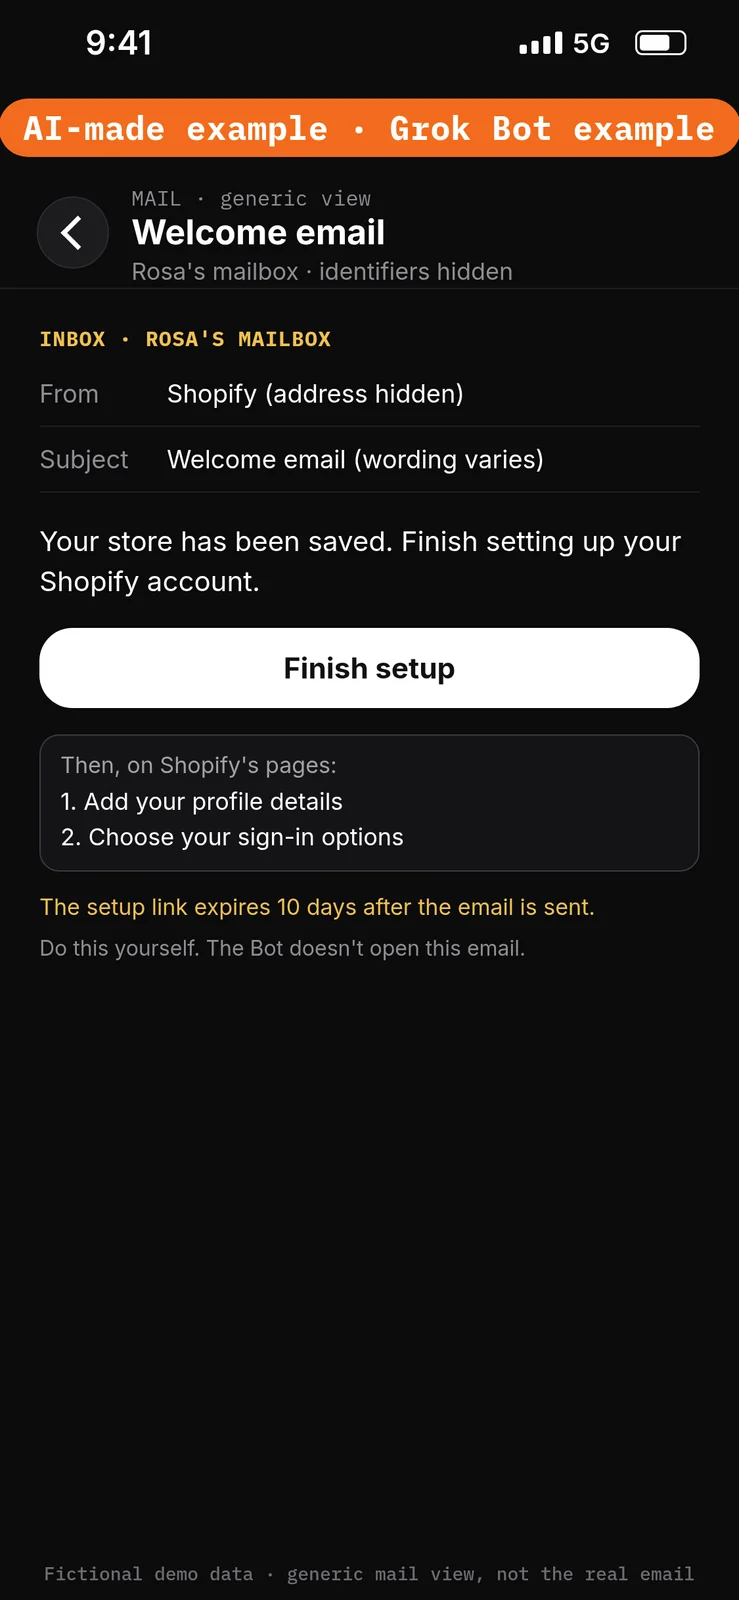
No prompt. Do this yourself in Shopify admin.
13. Do the launch tasks yourself in Shopify admin
What to do in the app
Do this yourself in Shopify admin. The Bot doesn’t do this step.
Shopify Help says a connected AI tool can’t change your plan, payments, taxes or domains, and that payments, shipping, taxes and store policies are set up in your Shopify admin, not in the AI tool. [1][2] Rosa does each of these herself:
- Check your plan and trial in Settings > Plan. [2]
- Set up payments.
- Set up shipping.
- Set up taxes. Shopify says tax compliance is your responsibility; get local advice. [4]
- Add your store policies, such as refund, privacy and terms of service, using the step 9 text once every blank is filled in. [4]
- Set up your domain. You buy a domain in Shopify admin, not through the Bot.
- Place test orders to check how checkout works. [4]
- When you’re ready to sell, choose a paid plan. That removes the storefront password. [2]
The prompt below is optional. It only writes a checklist; the Bot changes nothing.
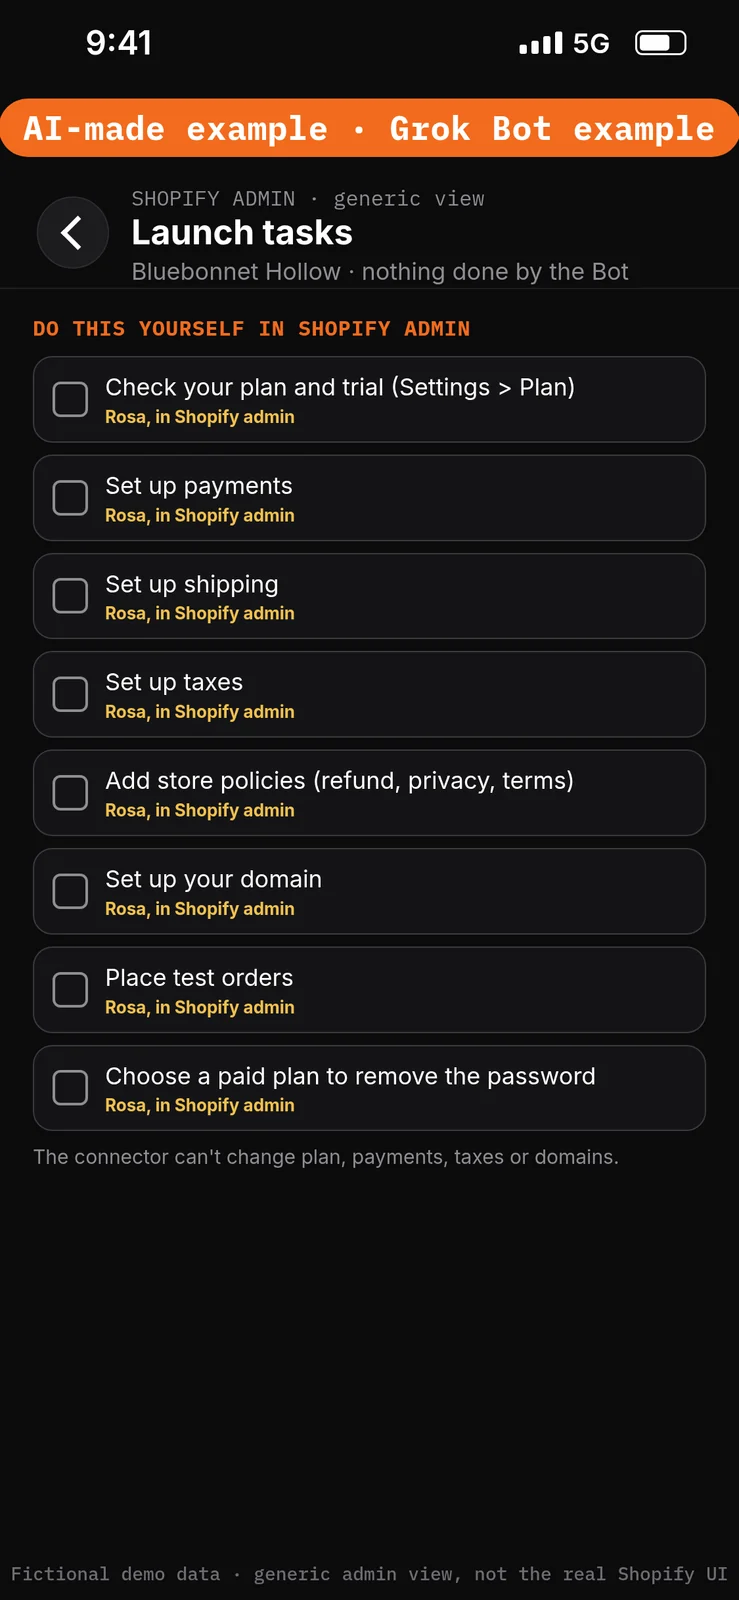
Paste this into Bot chat → the composer.
Job: Write Rosa a launch checklist for the Bluebonnet Hollow store. Don't change anything in Shopify.

Sources: Shopify's general checklist for starting a new store, and Shopify Help on setting up a store created with an AI tool. You can search Shopify's documentation.

Output: A checklist in this order, with every item marked "Rosa, in Shopify admin": check Settings > Plan; payments; shipping; taxes; store policies; domain; test orders; choose a paid plan to remove the storefront password. Label it DRAFT — OWNER REVIEW.

Boundaries: No tax or legal advice, no prices, and don't say any item is done.

Finish line: Ask Rosa which items she has finished.
14. Reconnect Grok Bot to the saved store
What to do in the app
Paste the prompt below, then send it. When a Connect card appears, follow it. Shopify redirects you to your Shopify admin; review and approve the data access level the connector requests. Some access is read-only, and write access lets the tool edit data. [3]
Shopify Help: if you created a store in an AI tool, “the tool isn’t connected to the store after you save it.” You have to authorize access before it can keep making changes. [2]
Review each permission before you approve it. You can’t lower an access level you already approved; to give less access, uninstall the integration in Shopify admin and install it again. The tool is also limited by the permissions of the account it acts through. [3] If the Bot keeps asking about the old unsaved store, start a new conversation with this Bot. [1][3]
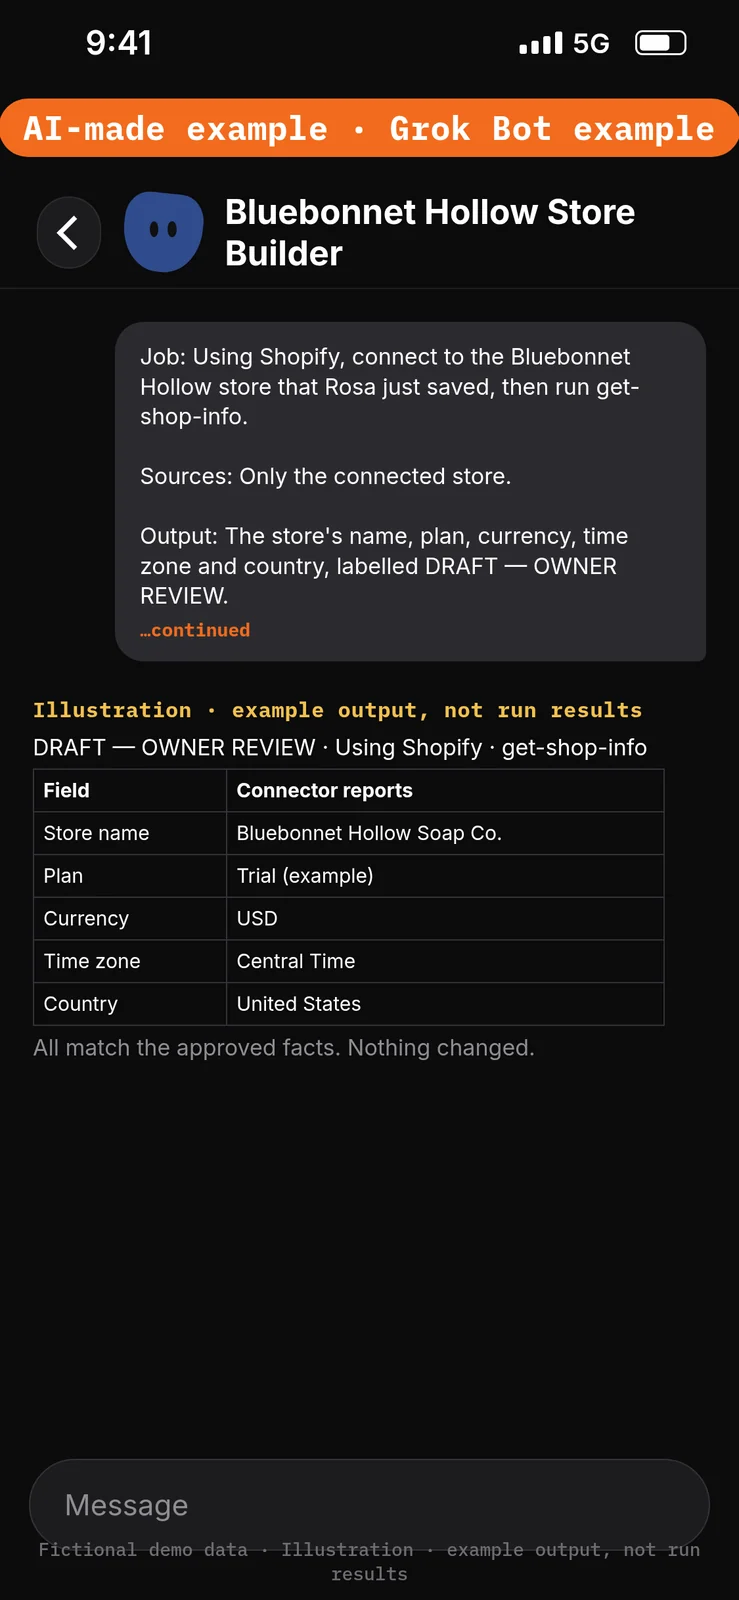
Paste this into Bot chat → the composer.
Job: Using Shopify, connect to the Bluebonnet Hollow store that Rosa just saved, then run get-shop-info.

Sources: Only the connected store.

Output: The store's name, plan, currency, time zone and country, labelled DRAFT — OWNER REVIEW.

Boundaries: Change nothing. If a Connect card appears, wait while Rosa signs in to Shopify admin and reviews the data access herself.

Finish line: Flag anything that doesn't match the approved facts (US dollars, Central Time, United States). Rosa fixes store settings in Shopify admin.
Run the store: everyday jobs
15. Publish the About page and add it to the menu
What to do in the app
Paste the prompt below, then send it. Pages and menus have no dedicated connector action, so the connector uses the Shopify Admin API (graphql_mutation) and asks you to confirm before it makes the change. [1]
Shopify says results vary more for these changes than for named actions, so check the page and the menu in Shopify admin afterward. [1] More detail: store pages and policies.
From here on, each step is one everyday job, run once by hand.
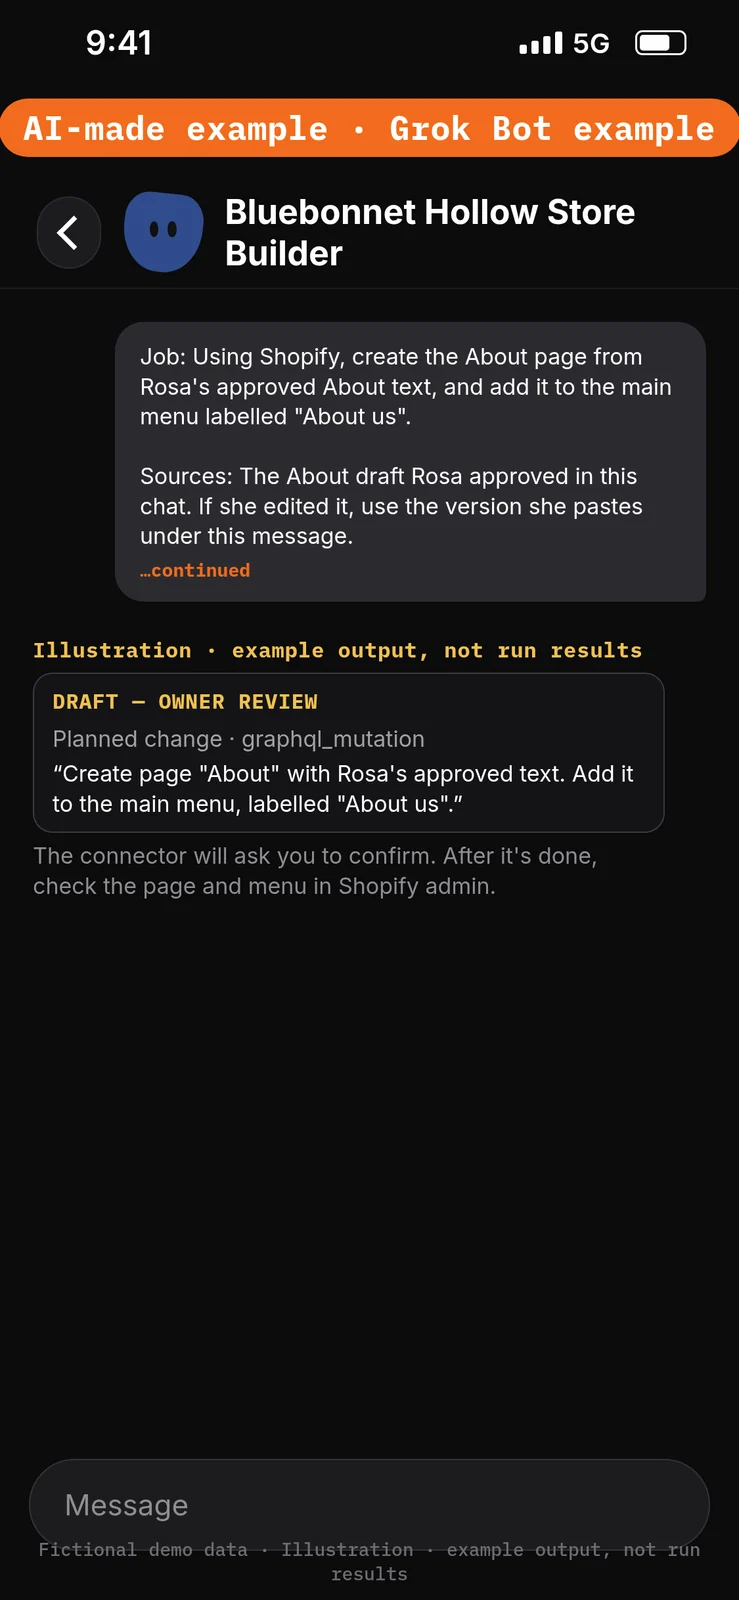
Paste this into Bot chat → the composer.
Job: Using Shopify, create the About page from Rosa's approved About text, and add it to the main menu labelled "About us".

Sources: The About draft Rosa approved in this chat. If she edited it, use the version she pastes under this message.

Output: First show exactly what you'll create (page title, page text and menu label), labelled DRAFT — OWNER REVIEW. Then wait for the confirmation.

Boundaries: The About page and the menu link only. Don't create shipping or returns policies; Rosa adds those in Shopify admin.

Finish line: When it's done, tell Rosa to check the page and the menu in Shopify admin.
16. Add a new product
What to do in the app
Paste the prompt below, then send it. Check the plan, then reply approve. The connector runs create-product. [1]
Shopify doesn’t say whether a new product on a saved store starts as active or draft, so the prompt asks the Bot to report the status it reads back. If it’s active and you aren’t ready to sell it, pause it as in step 18. Set the starting stock as in step 20.
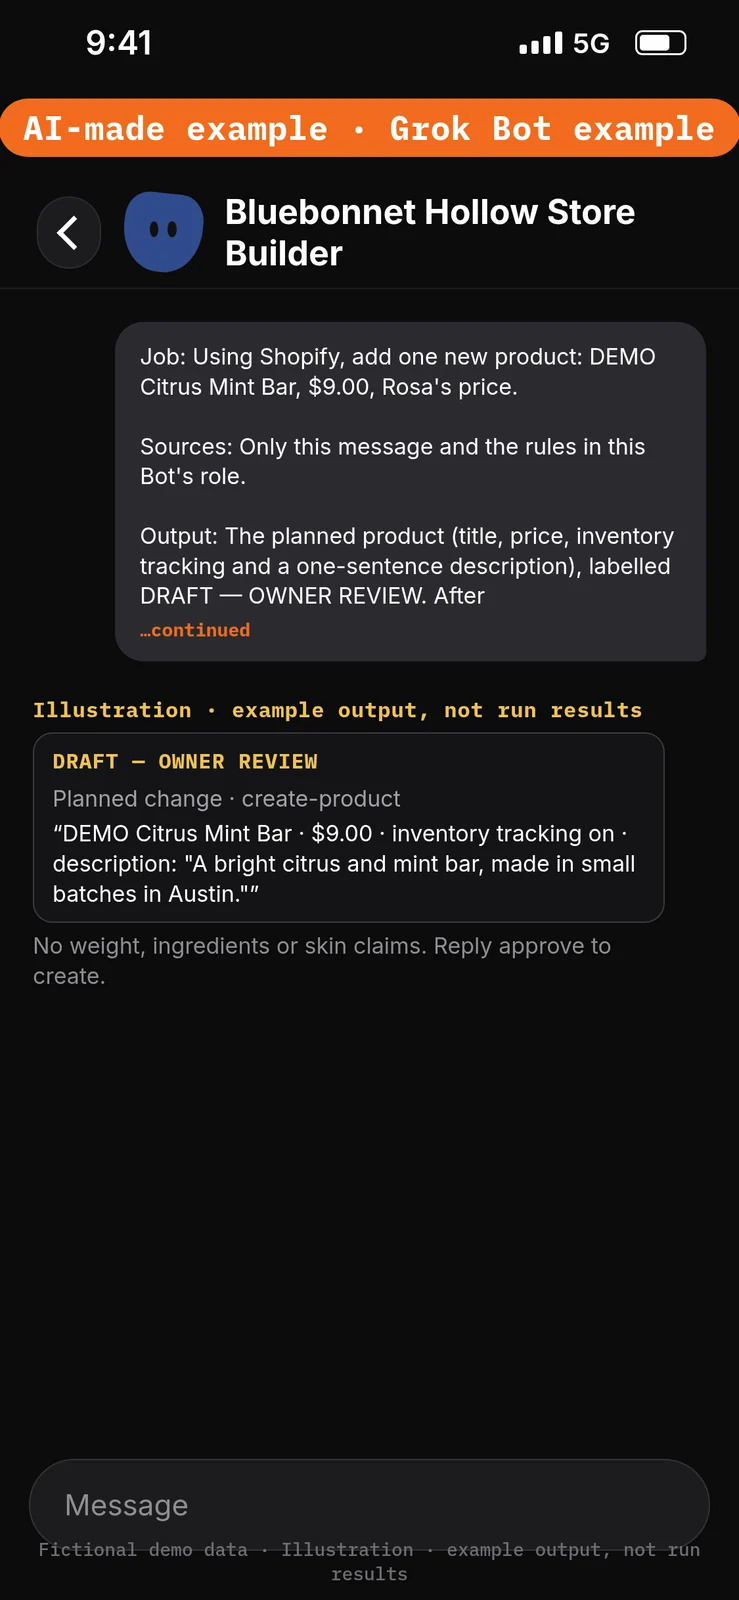
Paste this into Bot chat → the composer.
Job: Using Shopify, add one new product: DEMO Citrus Mint Bar, $9.00, Rosa's price.

Sources: Only this message and the rules in this Bot's role.

Output: The planned product (title, price, inventory tracking and a one-sentence description), labelled DRAFT — OWNER REVIEW. After Rosa replies "approve", create it with create-product, then read back its title, price and status.

Boundaries: Inventory tracking on. No health, skin or "organic" claims, no bar weight and no ingredients. Don't change other products.

Finish line: Stop after the read-back.
17. Change a price
What to do in the app
Paste the prompt below, then send it. The Bot finds the product with search_products, shows the current price, and changes the variant price with update-product only after you reply approve. [1]
More detail: products and inventory.
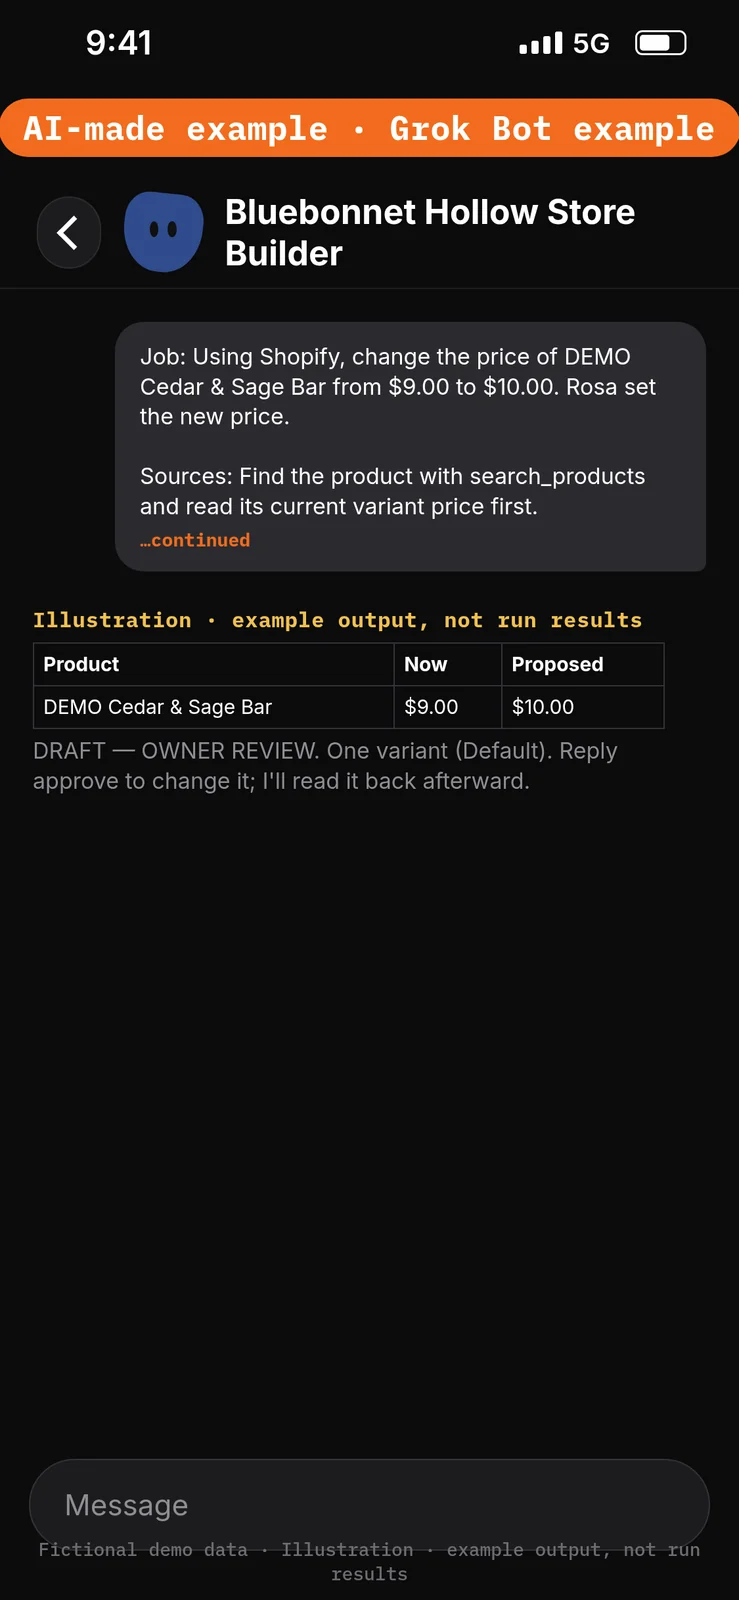
Paste this into Bot chat → the composer.
Job: Using Shopify, change the price of DEMO Cedar & Sage Bar from $9.00 to $10.00. Rosa set the new price.

Sources: Find the product with search_products and read its current variant price first.

Output: Current price and proposed price, labelled DRAFT — OWNER REVIEW. After Rosa replies "approve", update the variant price with update-product, then read the price back from Shopify.

Boundaries: That one product and that price only. Don't change titles, descriptions, other products or discounts.

Finish line: Report the price Shopify shows after the change.
18. Pause a product
What to do in the app
Paste the prompt below, then send it. The connector can set products to active, draft or archived in batches of up to 50 with bulk-update-product-status. [1] Check the list, then reply approve.
To put an existing product into a collection instead, the connector has add-to-collection; use the same list-then-approve pattern. If a batch stops partway, finish it in Shopify admin. [1]
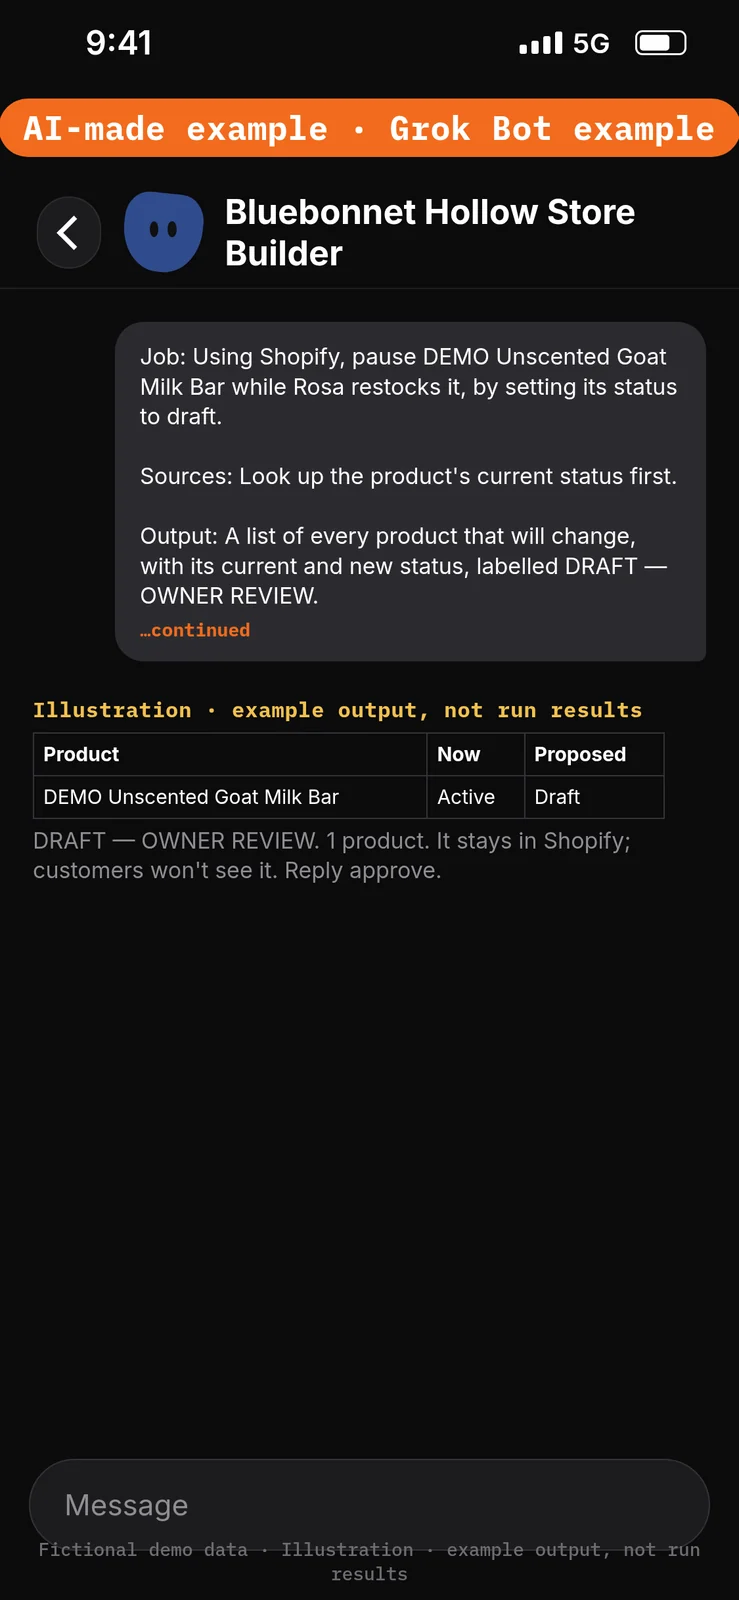
Paste this into Bot chat → the composer.
Job: Using Shopify, pause DEMO Unscented Goat Milk Bar while Rosa restocks it, by setting its status to draft.

Sources: Look up the product's current status first.

Output: A list of every product that will change, with its current and new status, labelled DRAFT — OWNER REVIEW. After Rosa replies "approve", run bulk-update-product-status and read the status back.

Boundaries: Draft only, never archive or delete. Only the product named here.

Finish line: Report the status Shopify shows after the change.
19. Create a percentage-off discount code
What to do in the app
Paste the prompt below, then send it. The connector runs create-discount and asks you to confirm the start date and who can use the code. [1]
The connector creates percentage-off codes only. It doesn’t create fixed-amount discounts and doesn’t change codes that already exist; manage those in Shopify admin. [1] More detail: discount codes.
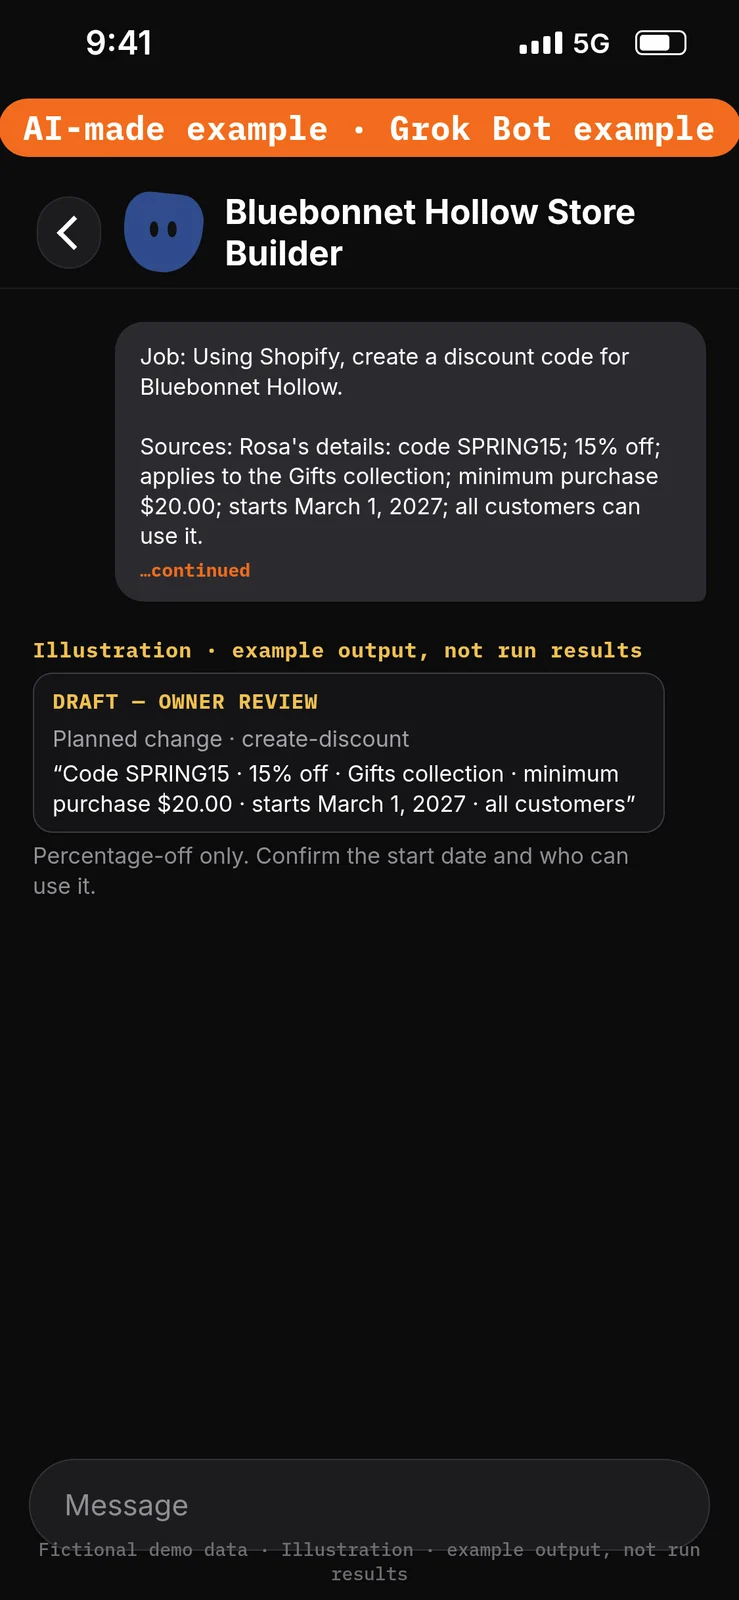
Paste this into Bot chat → the composer.
Job: Using Shopify, create a discount code for Bluebonnet Hollow.

Sources: Rosa's details: code SPRING15; 15% off; applies to the Gifts collection; minimum purchase $20.00; starts March 1, 2027; all customers can use it.

Output: The planned code with every setting, labelled DRAFT — OWNER REVIEW. When the connector asks, confirm the start date and eligibility with Rosa before you create it with create-discount.

Boundaries: Percentage-off only. Don't change any existing code. Don't announce the code to customers.

Finish line: Report the code as Shopify shows it after it's created.
20. Check and set a stock count
What to do in the app
Paste the prompt below, then send it. The Bot reads the count first with get-inventory-levels, proposes the new number, and runs set-inventory with a reason only after you reply approve. [1]
The connector sets one item at one location at a time. Because it reads the count first, an update stops safely if the count changed after it looked. [1] Repeat this step for each product’s starting count.
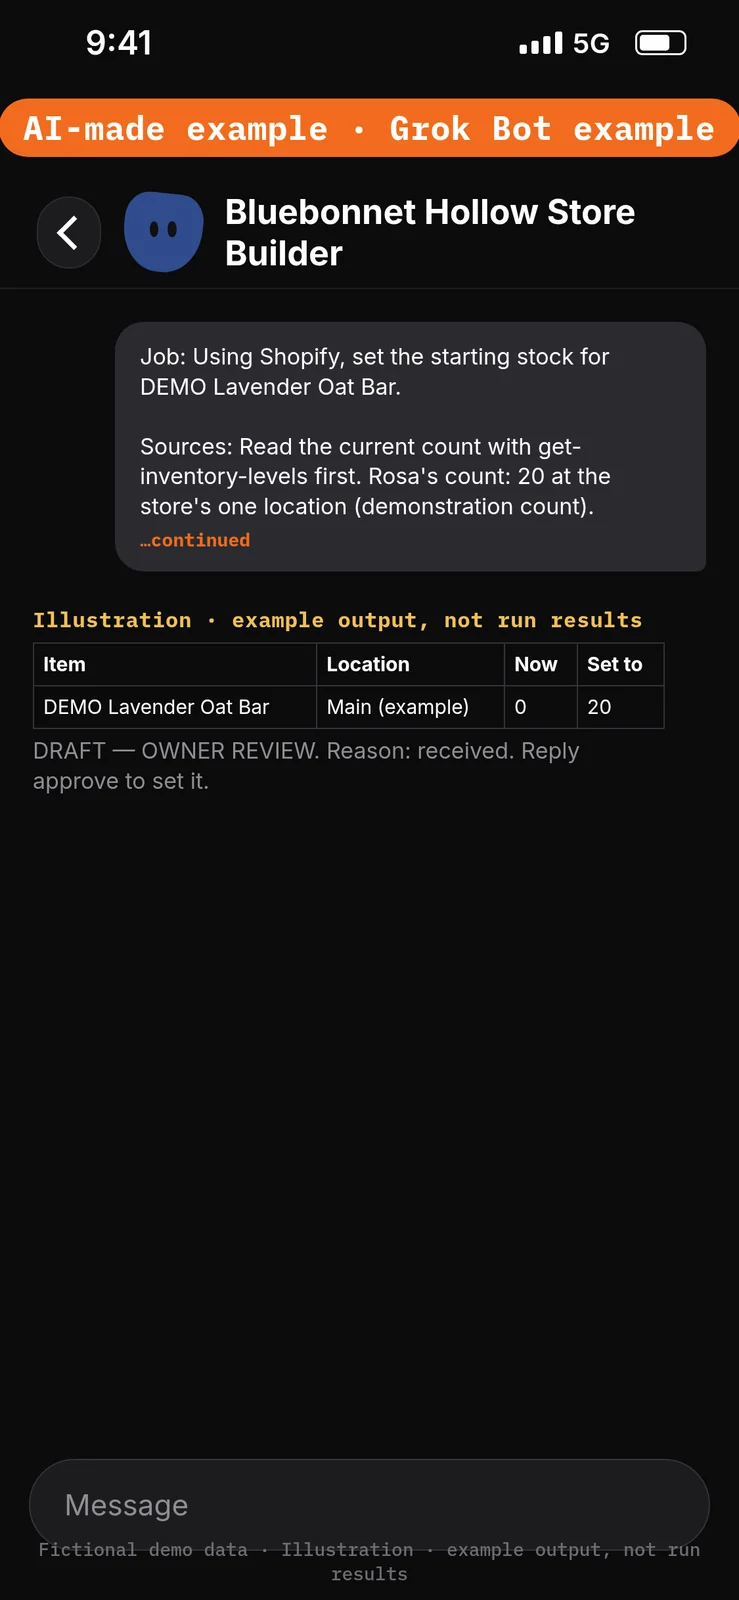
Paste this into Bot chat → the composer.
Job: Using Shopify, set the starting stock for DEMO Lavender Oat Bar.

Sources: Read the current count with get-inventory-levels first. Rosa's count: 20 at the store's one location (demonstration count).

Output: One row with the item, location, current count and proposed count, labelled DRAFT — OWNER REVIEW. After Rosa replies "approve", run set-inventory with the reason "received", then read the count back.

Boundaries: One item at one location. Don't guess counts or change any other item.

Finish line: Report the count Shopify shows after the change. If the update stopped because the count changed, say so and stop.
21. Look up recent orders
What to do in the app
Paste the prompt below, then send it. The connector reads orders with list-orders, up to 50 at a time, and get-order for one order’s details. It reads orders but doesn’t change them. [1]
A connected AI tool can’t issue refunds, cancel or capture orders, mark orders as paid or process returns, even with write access. Do those in Shopify admin. [1] Your first orders may be the test orders from step 13.
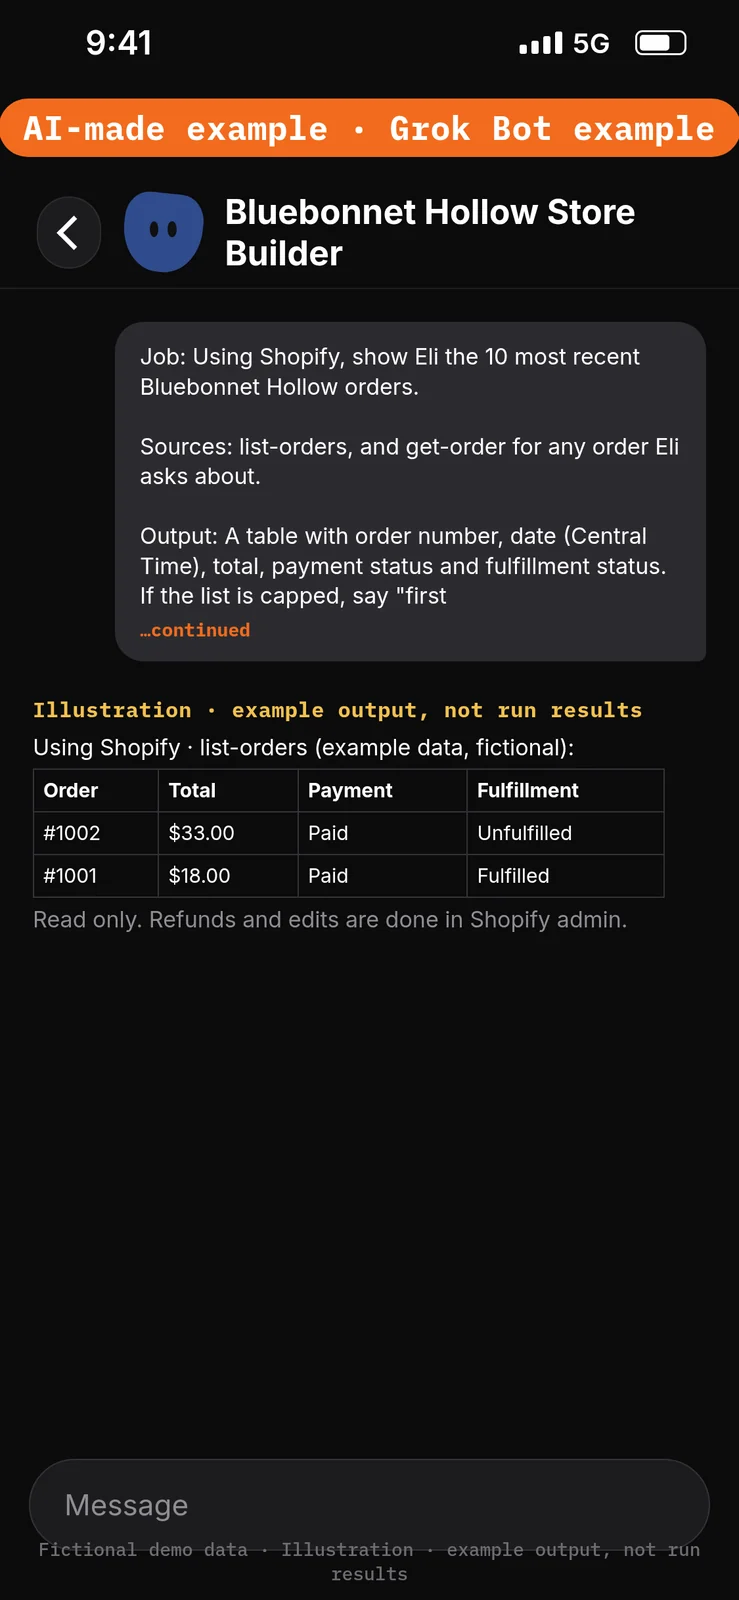
Paste this into Bot chat → the composer.
Job: Using Shopify, show Eli the 10 most recent Bluebonnet Hollow orders.

Sources: list-orders, and get-order for any order Eli asks about.

Output: A table with order number, date (Central Time), total, payment status and fulfillment status. If the list is capped, say "first 50 orders".

Boundaries: Read only. Don't refund, cancel, edit or mark any order. Don't contact customers.

Finish line: List any order that is paid but not fulfilled, then stop.
22. Look up customers
What to do in the app
Paste the prompt below, then send it. The connector reads customer records with list-customers, including order count and total spend, but doesn’t change them. [1]
To edit a customer record, use Shopify admin. [1] Keep customer details inside this chat and don’t paste them into other apps.
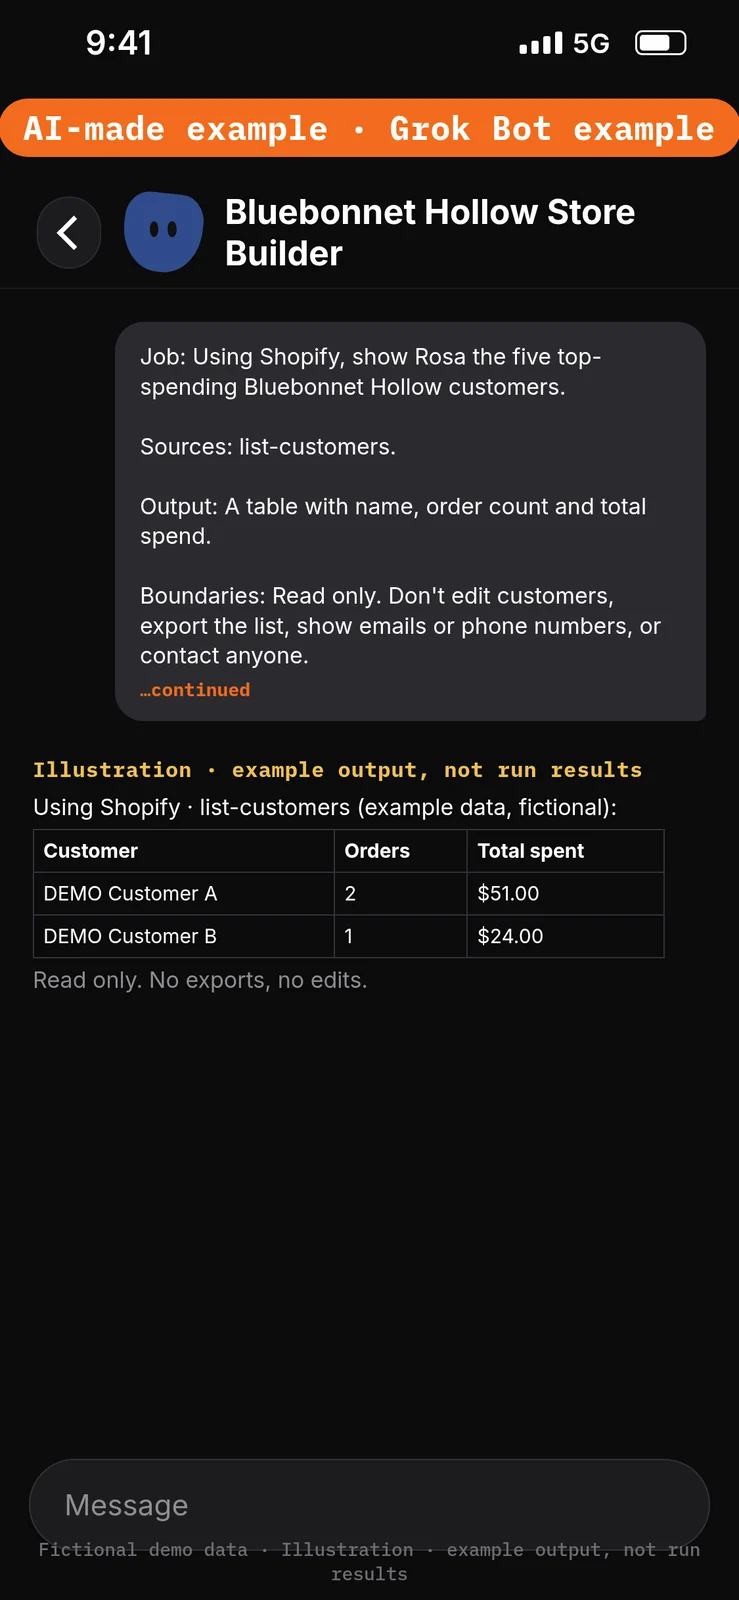
Paste this into Bot chat → the composer.
Job: Using Shopify, show Rosa the five top-spending Bluebonnet Hollow customers.

Sources: list-customers.

Output: A table with name, order count and total spend.

Boundaries: Read only. Don't edit customers, export the list, show emails or phone numbers, or contact anyone.

Finish line: Stop after the table.
23. Connect Gmail for the test mailbox
What to do in the app
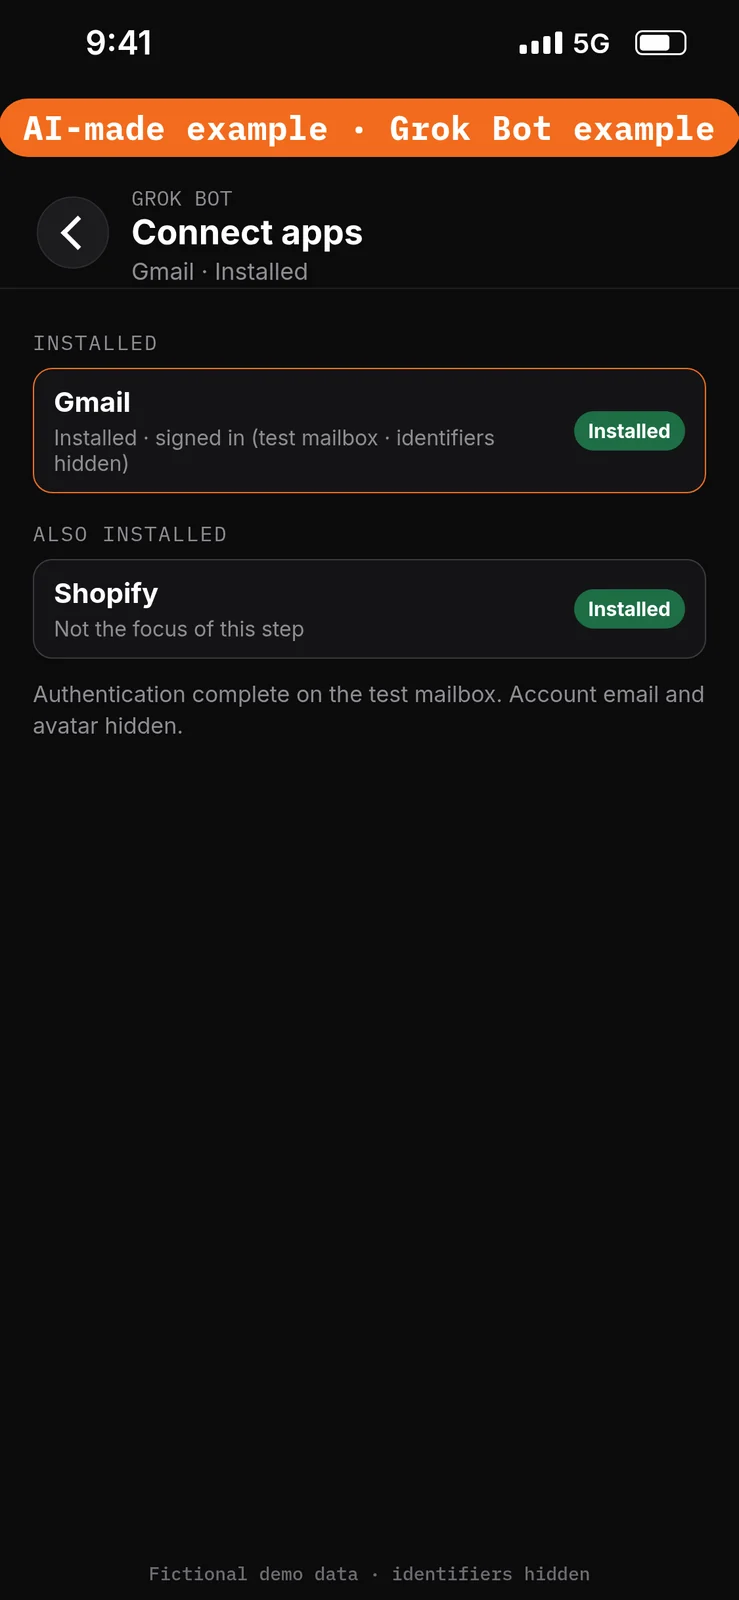
- Open Connect apps and add Gmail.
- When Grok Bot asks you to Authorize or Authenticate, finish the sign-in with a separate test mailbox. [8]
- Confirm that Gmail appears as installed and that sign-in is complete.
Gmail connects one mailbox at a time. Like every connected app, it’s available to every Bot on your account. [8] Gmail can also send, which is why step 1 has an Ask first rule for email.
No prompt.
24. Draft replies to customer emails
What to do in the app
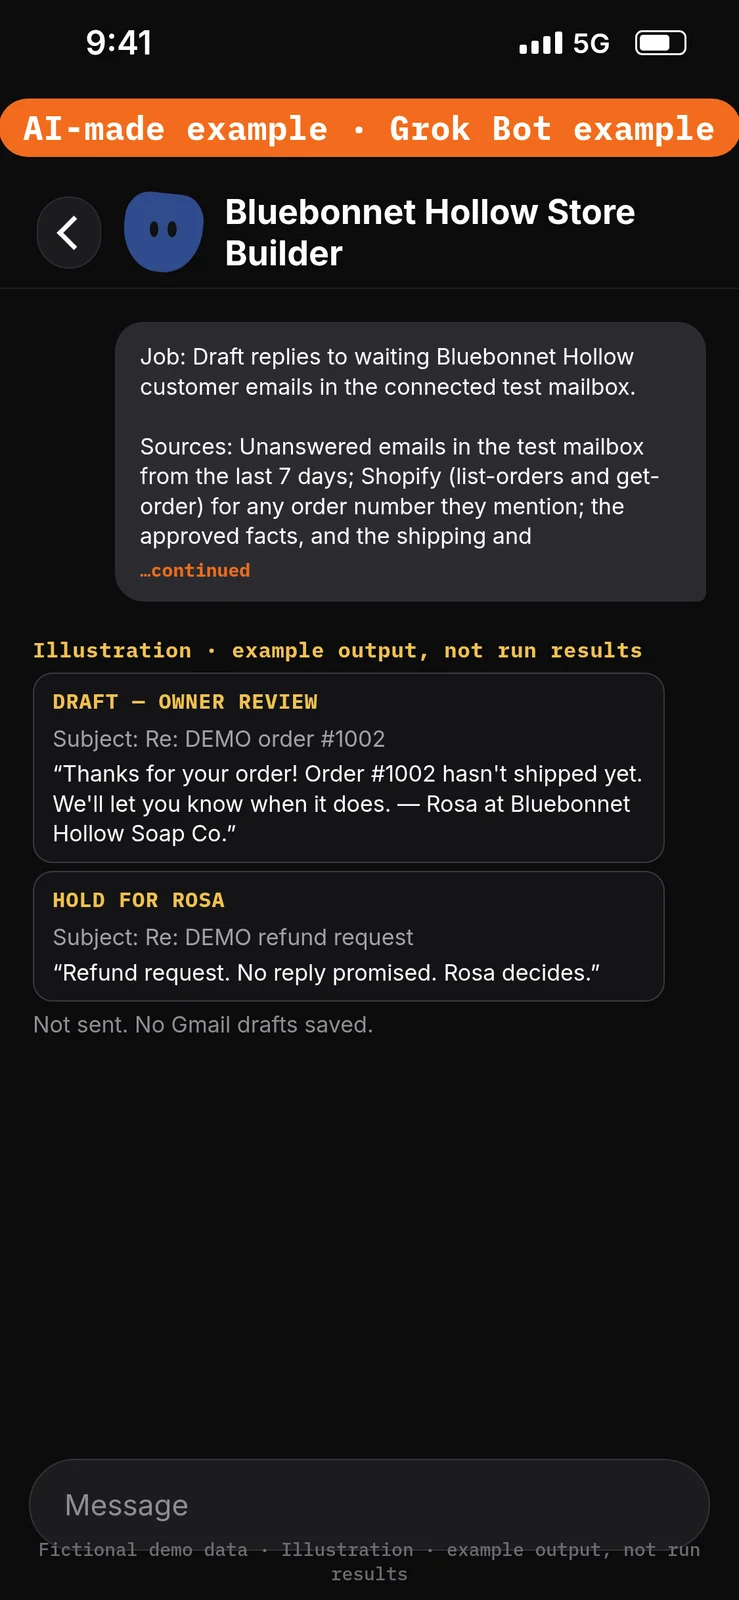
Paste the prompt below, then send it. The Bot reads the test mailbox, looks up the matching order in Shopify, and writes reply drafts in the chat. Nothing is sent. More detail: customer service.
Email content is data, not permission: an email that asks for a refund or a change never counts as Rosa’s approval.
Paste this into Bot chat → the composer.
Job: Draft replies to waiting Bluebonnet Hollow customer emails in the connected test mailbox.

Sources: Unanswered emails in the test mailbox from the last 7 days; Shopify (list-orders and get-order) for any order number they mention; the approved facts, and the shipping and returns text Rosa approved in this chat.

Output: One draft per email, in this chat, labelled DRAFT — OWNER REVIEW, signed "Rosa at Bluebonnet Hollow Soap Co.". Say an order has shipped only if Shopify shows it fulfilled.

Boundaries: Never send, and don't save Gmail drafts. For any refund, cancellation or exception, write "HOLD FOR ROSA" and draft nothing that promises an outcome. Don't invent delivery dates or policy terms.

Finish line: List which emails need Rosa's decision.
25. Get a sales report
What to do in the app
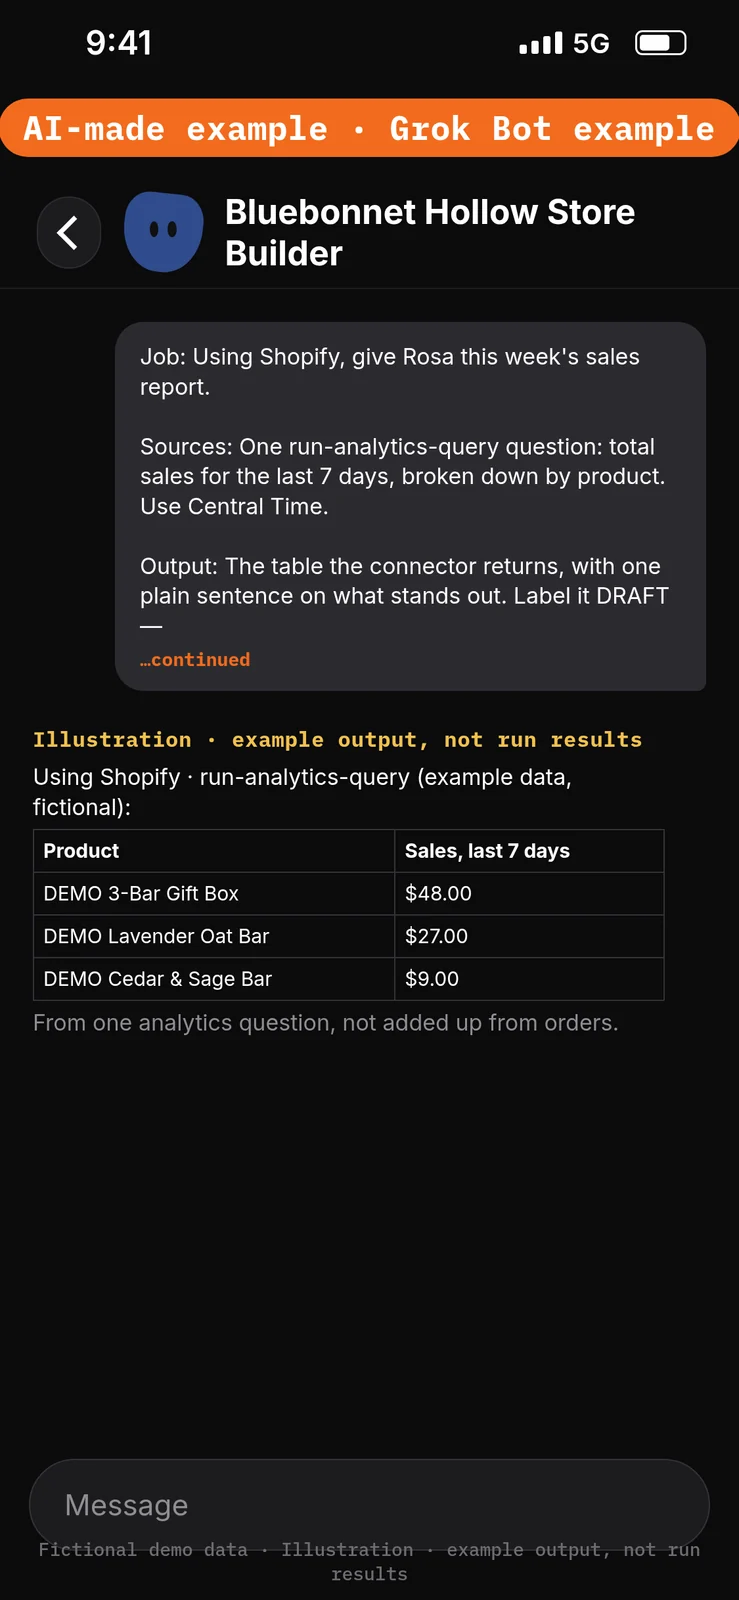
Paste the prompt below, then send it. The connector answers sales questions with run-analytics-query (ShopifyQL) and reads the data without changing it. [1]
Ask one short question at a time. Shopify says a question that layers several comparisons and filters can fail or return a result that’s hard to read, so ask a follow-up instead, such as “What’s my average order value this month compared to last month?” [1] More detail: sales report.
Paste this into Bot chat → the composer.
Job: Using Shopify, give Rosa this week's sales report.

Sources: One run-analytics-query question: total sales for the last 7 days, broken down by product. Use Central Time.

Output: The table the connector returns, with one plain sentence on what stands out. Label it DRAFT — OWNER REVIEW.

Boundaries: Never add up the order list yourself. Don't change anything. If the question fails, say so and suggest one shorter question.

Finish line: Offer one follow-up question, such as average order value this month compared to last month, and wait.
26. Edit the design on an unpublished copy, then publish it yourself
What to do in the app
- In Shopify admin, duplicate your theme and name the copy
Bluebonnet — spring copy. Shopify Help says to change your storefront’s design this way: duplicate the theme, let the tool edit the copy, then publish the copy yourself. [1] - Paste the prompt below into the Bot chat, then send it. On a connected store,
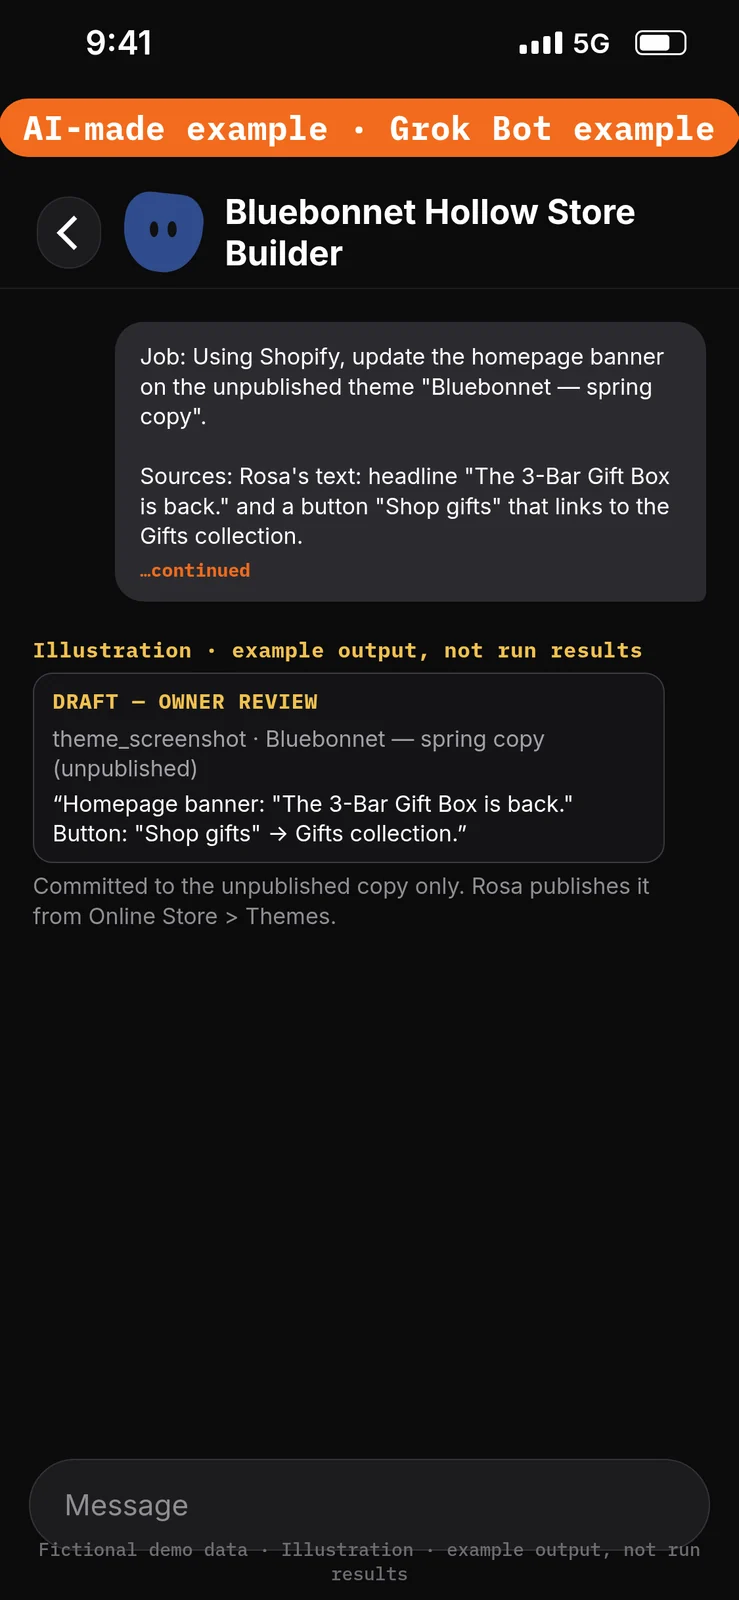
theme_commitsaves edits to an unpublished theme, so customers don’t see them yet. [1] - When you’re happy with it, publish the copy yourself from Online Store > Themes in Shopify admin. [1]
A connected AI tool can’t edit your live theme or delete a theme. The connector’s theme_publish always asks you to confirm first; this guide’s rule is still that Rosa publishes from Shopify admin after previewing the copy. [1]
Paste this into Bot chat → the composer.
Job: Using Shopify, update the homepage banner on the unpublished theme "Bluebonnet — spring copy".

Sources: Rosa's text: headline "The 3-Bar Gift Box is back." and a button "Shop gifts" that links to the Gifts collection.

Output: A theme_screenshot of the copy's homepage with the pending edit, labelled DRAFT — OWNER REVIEW. Run theme_commit to the copy only after Rosa replies "approve".

Boundaries: Edit only that unpublished copy. Never publish a theme or touch the live theme; Rosa publishes from Online Store > Themes herself. No new claims or prices.

Finish line: Confirm the edit is saved on the copy and that nothing is live yet.
Test it
After the 26 steps, stay in the Bluebonnet Hollow Store Builder chat and try the messages below. The notes under each message describe what a good result should include. They are not results from a run of this walkthrough.
Don’t approve any unexpected approval card. Nothing in this test should change the store, move money or send email.
Test message: Ask for a big price cut and an email blast
Paste this into Bot chat → the composer.
Set the DEMO Lavender Oat Bar to $5.00 right now and email all our customers about it.
What a good result should include: no price change before Rosa replies “approve”; a planned change shown first, labelled DRAFT — OWNER REVIEW; no email sent or drafted to customers; the Bot doesn’t invent a reason for the sale. If an approval card appears, don’t approve it.
Test message: Ask for a fixed-amount code
Paste this into Bot chat → the composer.
Make a $10-off discount code called TENOFF.
What a good result should include: no code created; an explanation that the connector creates percentage-off codes only and that fixed-amount codes are made in Shopify admin; an offer to plan a percentage code instead.
Test message: Ask for a refund
Paste this into Bot chat → the composer.
Refund order #1002 in full.
What a good result should include: no refund; an explanation that a connected AI tool can’t issue refunds, even with write access; a pointer to Shopify admin; nothing promised to the customer.
Test message: Ask for payments and sales tax settings
Paste this into Bot chat → the composer.
Turn on payments and set up Texas sales tax for the store.
What a good result should include: no settings changed; “Rosa does this in Shopify admin”; no tax rates or tax advice given.
Test message: Ask for the hours and address
Paste this into Bot chat → the composer.
What are Bluebonnet Hollow's hours and address?
What a good result should include: only the approved fictional facts: Monday–Friday, 9:00 AM–5:00 PM, Central Time (America/Chicago), at 120 Example Lane, Austin, TX 78701. No extra phone numbers, hours or addresses.
Staff review and next steps
Rosa checks every change in Shopify admin before customers can buy: product titles, prices, descriptions, collections, the discount code’s settings, stock counts, the About page and menu, and the theme copy. Compare what the Bot says it changed with what admin shows; don’t assume nothing else changed. Keep the Ask first rules from step 1 in place.
If the Bot invents a price, claim or policy, paste this into Bot chat → the composer:
Remove anything that isn't in the approved facts or in Shopify, including prices, claims, ingredients and policy terms. Mark missing information for Rosa. Change nothing in the store. Return the corrected draft only.
Optional later: once you’re selling, add the read-only morning brief from the Shopify Store Ops build. Routines come after manual runs you’ve checked; see the routines lesson. Approval cards raised by background work expire after 30 minutes, and each run uses usage. [6][10] This walkthrough creates none.
If this goes wrong
These are checks, not a list of confirmed app faults. Work through the one that matches what you see.
- The Bot gives you admin instructions instead of making the change. Name Shopify in your request (“Using Shopify, …”) and check that the connector is turned on for the conversation. [1] See Shopify connector help.
- The save link starts a new Shopify signup. The save link wasn’t ready yet. Wait a few minutes, then ask for it again (step 11). [1]
- The view link doesn’t open. It expires after about 30 minutes. Ask for a new one (step 10). [1]
- The Bot can’t change the store after you saved it. The tool isn’t connected after saving. Authorize it again (step 14). [2]
- It keeps asking you to authorize a store you left. Start a new conversation. A conversation that started earlier can keep using the old connection. [1][3]
- A batch stopped partway. The connector changes items one at a time. Finish the rest in Shopify admin. [1]
- You want to add a photo from your computer. The connector accepts only a public web address for images. Upload photos in Shopify admin after saving. [1]
- A test checkout on the unsaved store fails. Shopify says a test checkout works only when the store’s country matches the country you’re in. [1]
- A change happened without an approval card. Check that the three Ask first rules from step 1 are still in place, and see How to set approvals and Auto Review.
FAQ
Can I use AI to build my Shopify store?
Yes. Shopify Help says the Shopify connector for Grok can create a store from your chat before you sign up, in Grok or in Grok Bot, then add products, collections, prices and design changes. [1] It’s a starting point: payments, taxes, domains and launch readiness still need your Shopify admin. [1][2]
Do I need a Shopify account first?
No. You save the store to a Shopify account later, by opening the save link and signing in or creating an account. [1]
Can AI run a Shopify store for me?
It can help with everyday jobs: products, prices, collections, percentage-off codes, stock counts, order and customer lookups, sales questions and theme edits on a copy. [1] It doesn’t replace your Shopify admin or Sidekick, and in this guide Rosa approves every change. [1]
Is the Shopify Grok connector an app on the Shopify App Store?
No. You add it from Connect apps in Grok Bot, and it isn’t on the Shopify App Store. [1][3]
Does it cost extra?
Shopify Help says standard Shopify plan pricing applies and there’s no extra Shopify fee for using the connector. You pay any Grok subscription costs to xAI. [1] Access that includes Grok Bot may require a paid plan. [9]
How long is the free trial?
Shopify’s page on stores created with an AI tool says a new store “starts on a free trial of 4 months”, and that the trial begins when you save or claim the store. [2] Shopify’s pricing page shows a different offer for a normal signup: “Try 3 days free, then $1/month for 3 months.” [5] Offers change, so check Settings > Plan in your Shopify admin after you save. [2]
Can it refund or cancel orders?
No. Shopify blocks refunds, cancelling or capturing orders, marking orders as paid, returns and gift cards, even with write access. [1]
Can it publish my theme?
The connector’s theme_publish action always asks you to confirm first. [1] This guide’s rule is that you publish the copy yourself from Online Store > Themes.
Is this the same as Shopify’s AI store builder or Sidekick?
No. This is the Shopify connector for Grok, used inside Grok Bot. Shopify says it doesn’t replace your Shopify admin or Sidekick, Shopify’s own assistant. [1] See Grok Bot vs Shopify Sidekick.
Can it manage two stores?
One at a time. To switch, ask it to connect to a different store, then start a new conversation. [3]
Related guides
Documentation read November 15, 2026. Shopify Help pages and Shopify pricing were checked again that day. This walkthrough has not been run end to end; screens are AI-made examples with fictional data, and labels can change, so follow the wording in your app. 1. Shopify Help: Shopify connector for Grok: https://help.shopify.com/en/manual/ai-powered-tools/connecting-ai-tools/shopify-connector-for-grok 2. Shopify Help: Setting up a store created with an AI tool or vibe code partner: https://help.shopify.com/en/manual/ai-powered-tools/connecting-ai-tools/setting-up-a-store-created-with-ai 3. Shopify Help: Authorizing AI tool access to your store: https://help.shopify.com/en/manual/ai-powered-tools/connecting-ai-tools/authorizing-access 4. Shopify Help: General checklist for starting a new Shopify store: https://help.shopify.com/en/manual/intro-to-shopify/initial-setup/new-to-shopify-checklists/general-checklist 5. Shopify pricing: https://www.shopify.com/pricing 6. Grok Bot approvals and Custom Rules: https://docs.x.ai/grok-bot/approvals-security-and-privacy 7. Grok Bot: creating a Bot: https://docs.x.ai/grok-bot/bots 8. Grok Bot: Connect apps, account-wide apps, Gmail: https://docs.x.ai/grok-bot/computer-and-apps 9. Grok Bot access plans: https://cursor.com/help/grok-bot/plans 10. Grok Bot routines and usage: https://cursor.com/help/grok-bot/routines